Just a few small modifications to the Chatteris.biz Weather pages:
1) The current spate of lightning has caused a problem of page formatting, originally when a storm cell was detected, the information was displayed inside the header of the page, as the lighting cells grew and the information increased, this caused the web page to overrun and loose formatting, I posted the problem in the wxforum.net forum and Wim sorted the script in moments.
Only when lightning cells are detected, will the page header show the lightning alert against a red background, clicking on this message will show the information, I have also added a clickable shortcut to the lightning map page and also a clickable link to how to set a lightning alert up.
Weather alerts page can be accessed from the menu as always.
2) Tidied up the wxspace pages and the radio ham information by adding additional links and sorting page validation errors.
3) Added information on lightning types.
4) Alert message when the weather station is going offline to protect its sensitive and expensive lightning detection equipment, this equipment failed last year due to a storm and I don’t want a repeat, I think the issue was the imbalance in ground potential, so in future when a large storm is over Chatteris, the broadband and external aerial will be unplugged.
Thought I’d do a quick update on how I’m progressing with my shack equipment and any changes I’ve made since my last blog.
I have done a fair bit of reading on the subject of RF Grounding, as opposed to safety earthing, where the shack is on the first floor as is mine, the issue is the 4m grounding cable which goes to the earth rods, dependent on this cables length being a derivative of a particular wavelength, it may act as an additional antenna and radiate, especially with my proposal of using an end fed antenna which is unbalanced.
To be honest it seems like a black art, so to avoid any problems I may have gone over the top, but better that, than problems later on, so what have I done.
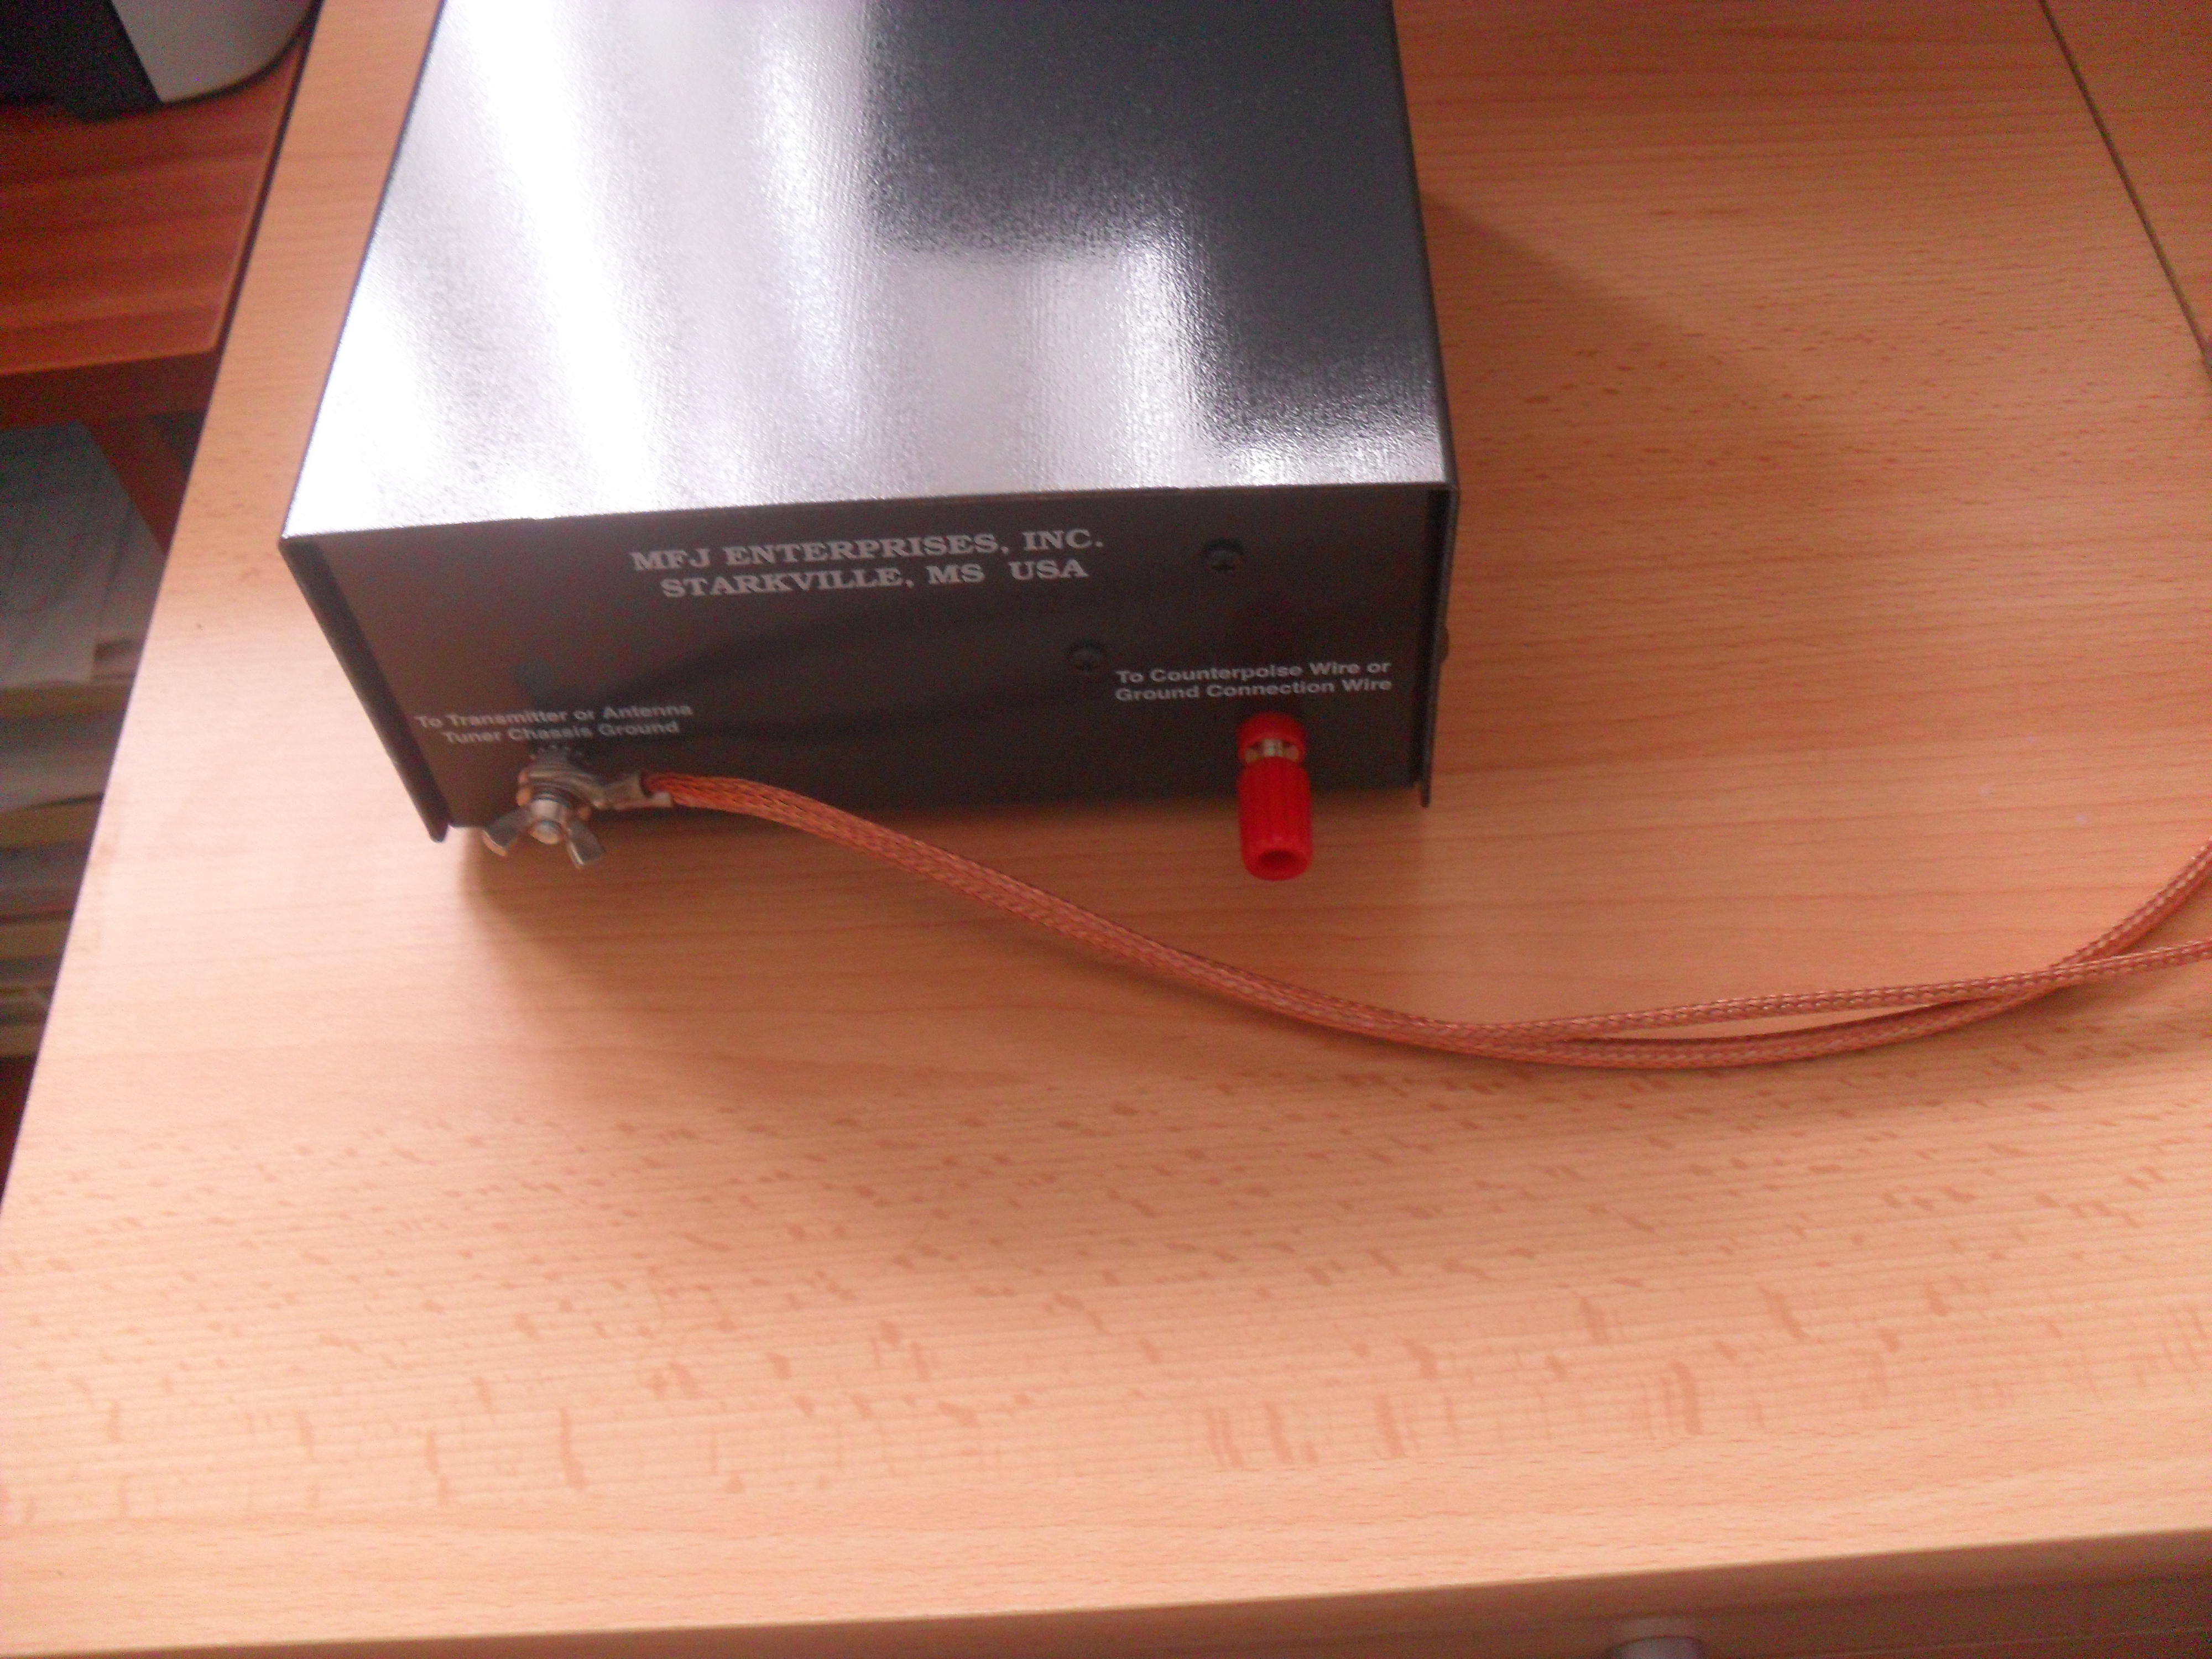
First job was to purchase a MFJ-931 Artificial Ground, this unit allows the cable to the ground rods to be tuned out of being a radiating element returning it to a relatively effective path for RF currents to drive against. I will be installing more earth rods local to the SCG Tuner as well as installing counterpoise wires, but that is for another blog :-).
The MFJ-931 is on top of the MFJ-949E tuner.
The rear of the Artificial Earth has two terminals, the wing nut one is to bring in the grounds from the rig and ancillary equipment, in my case it’s simply the Rig and the antenna tuner, the picture below shows the rear of the MFJ-931 with the two copper braided leads crimped up ready for the incoming connection.
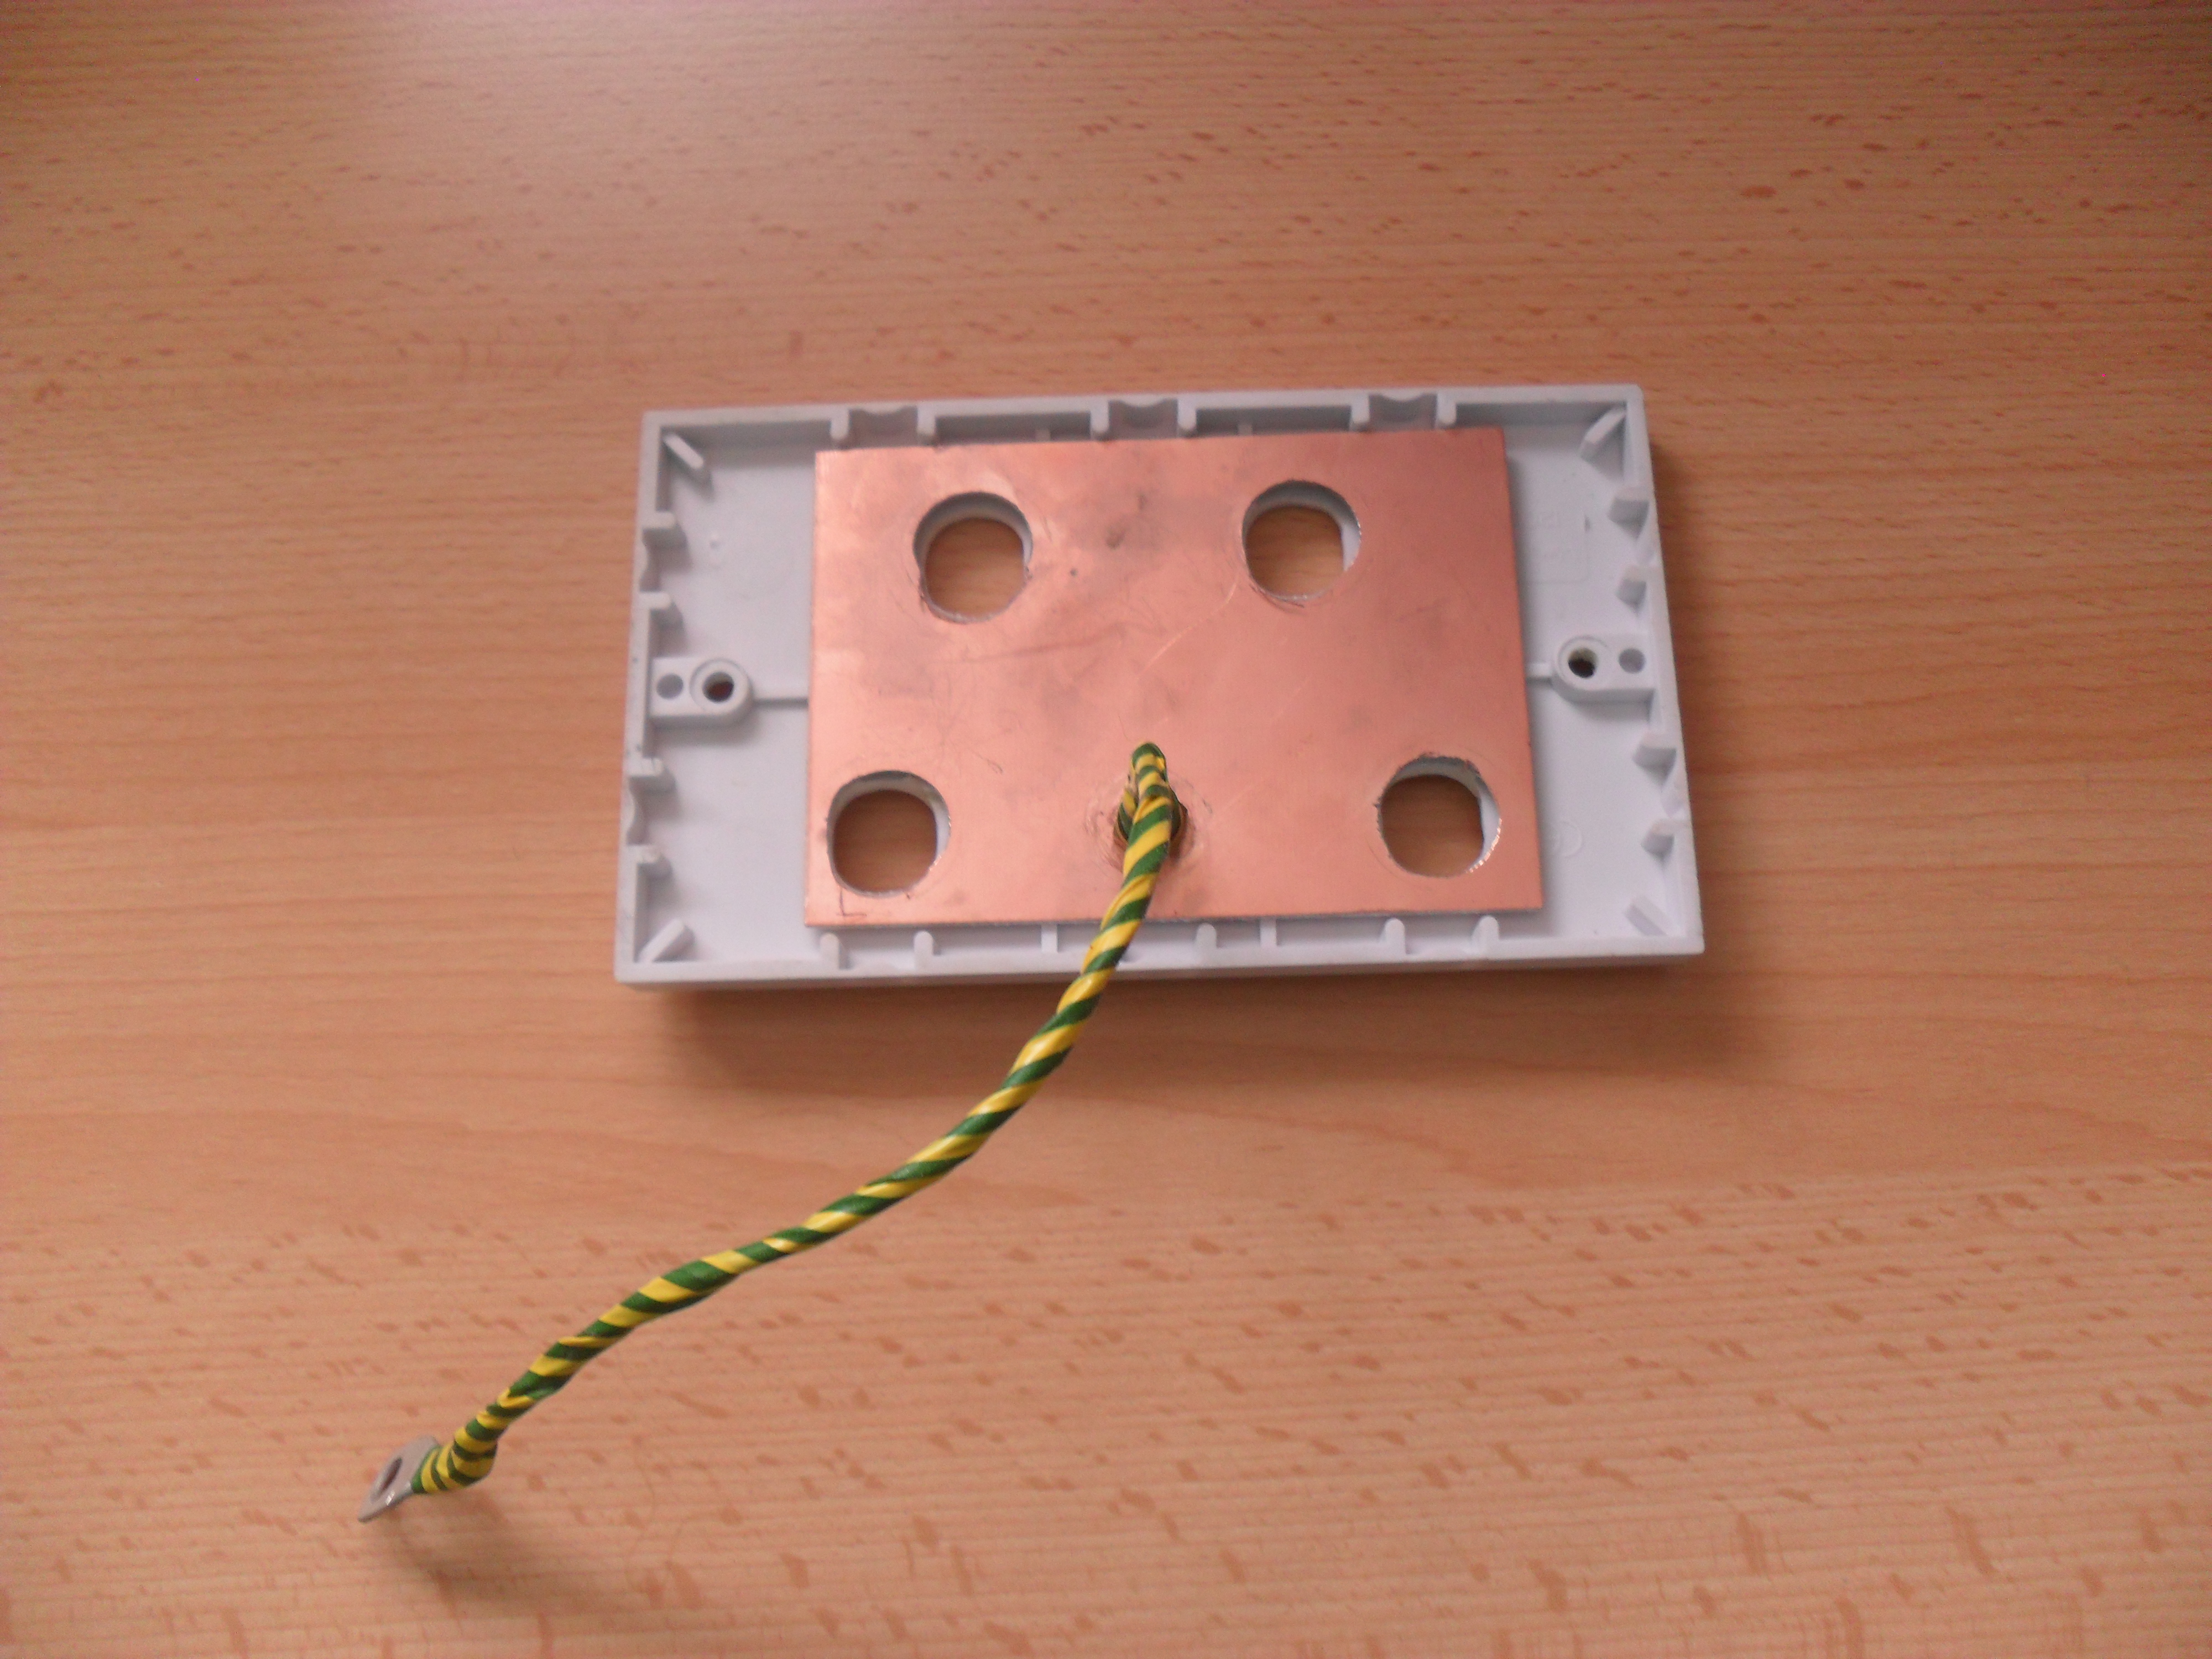
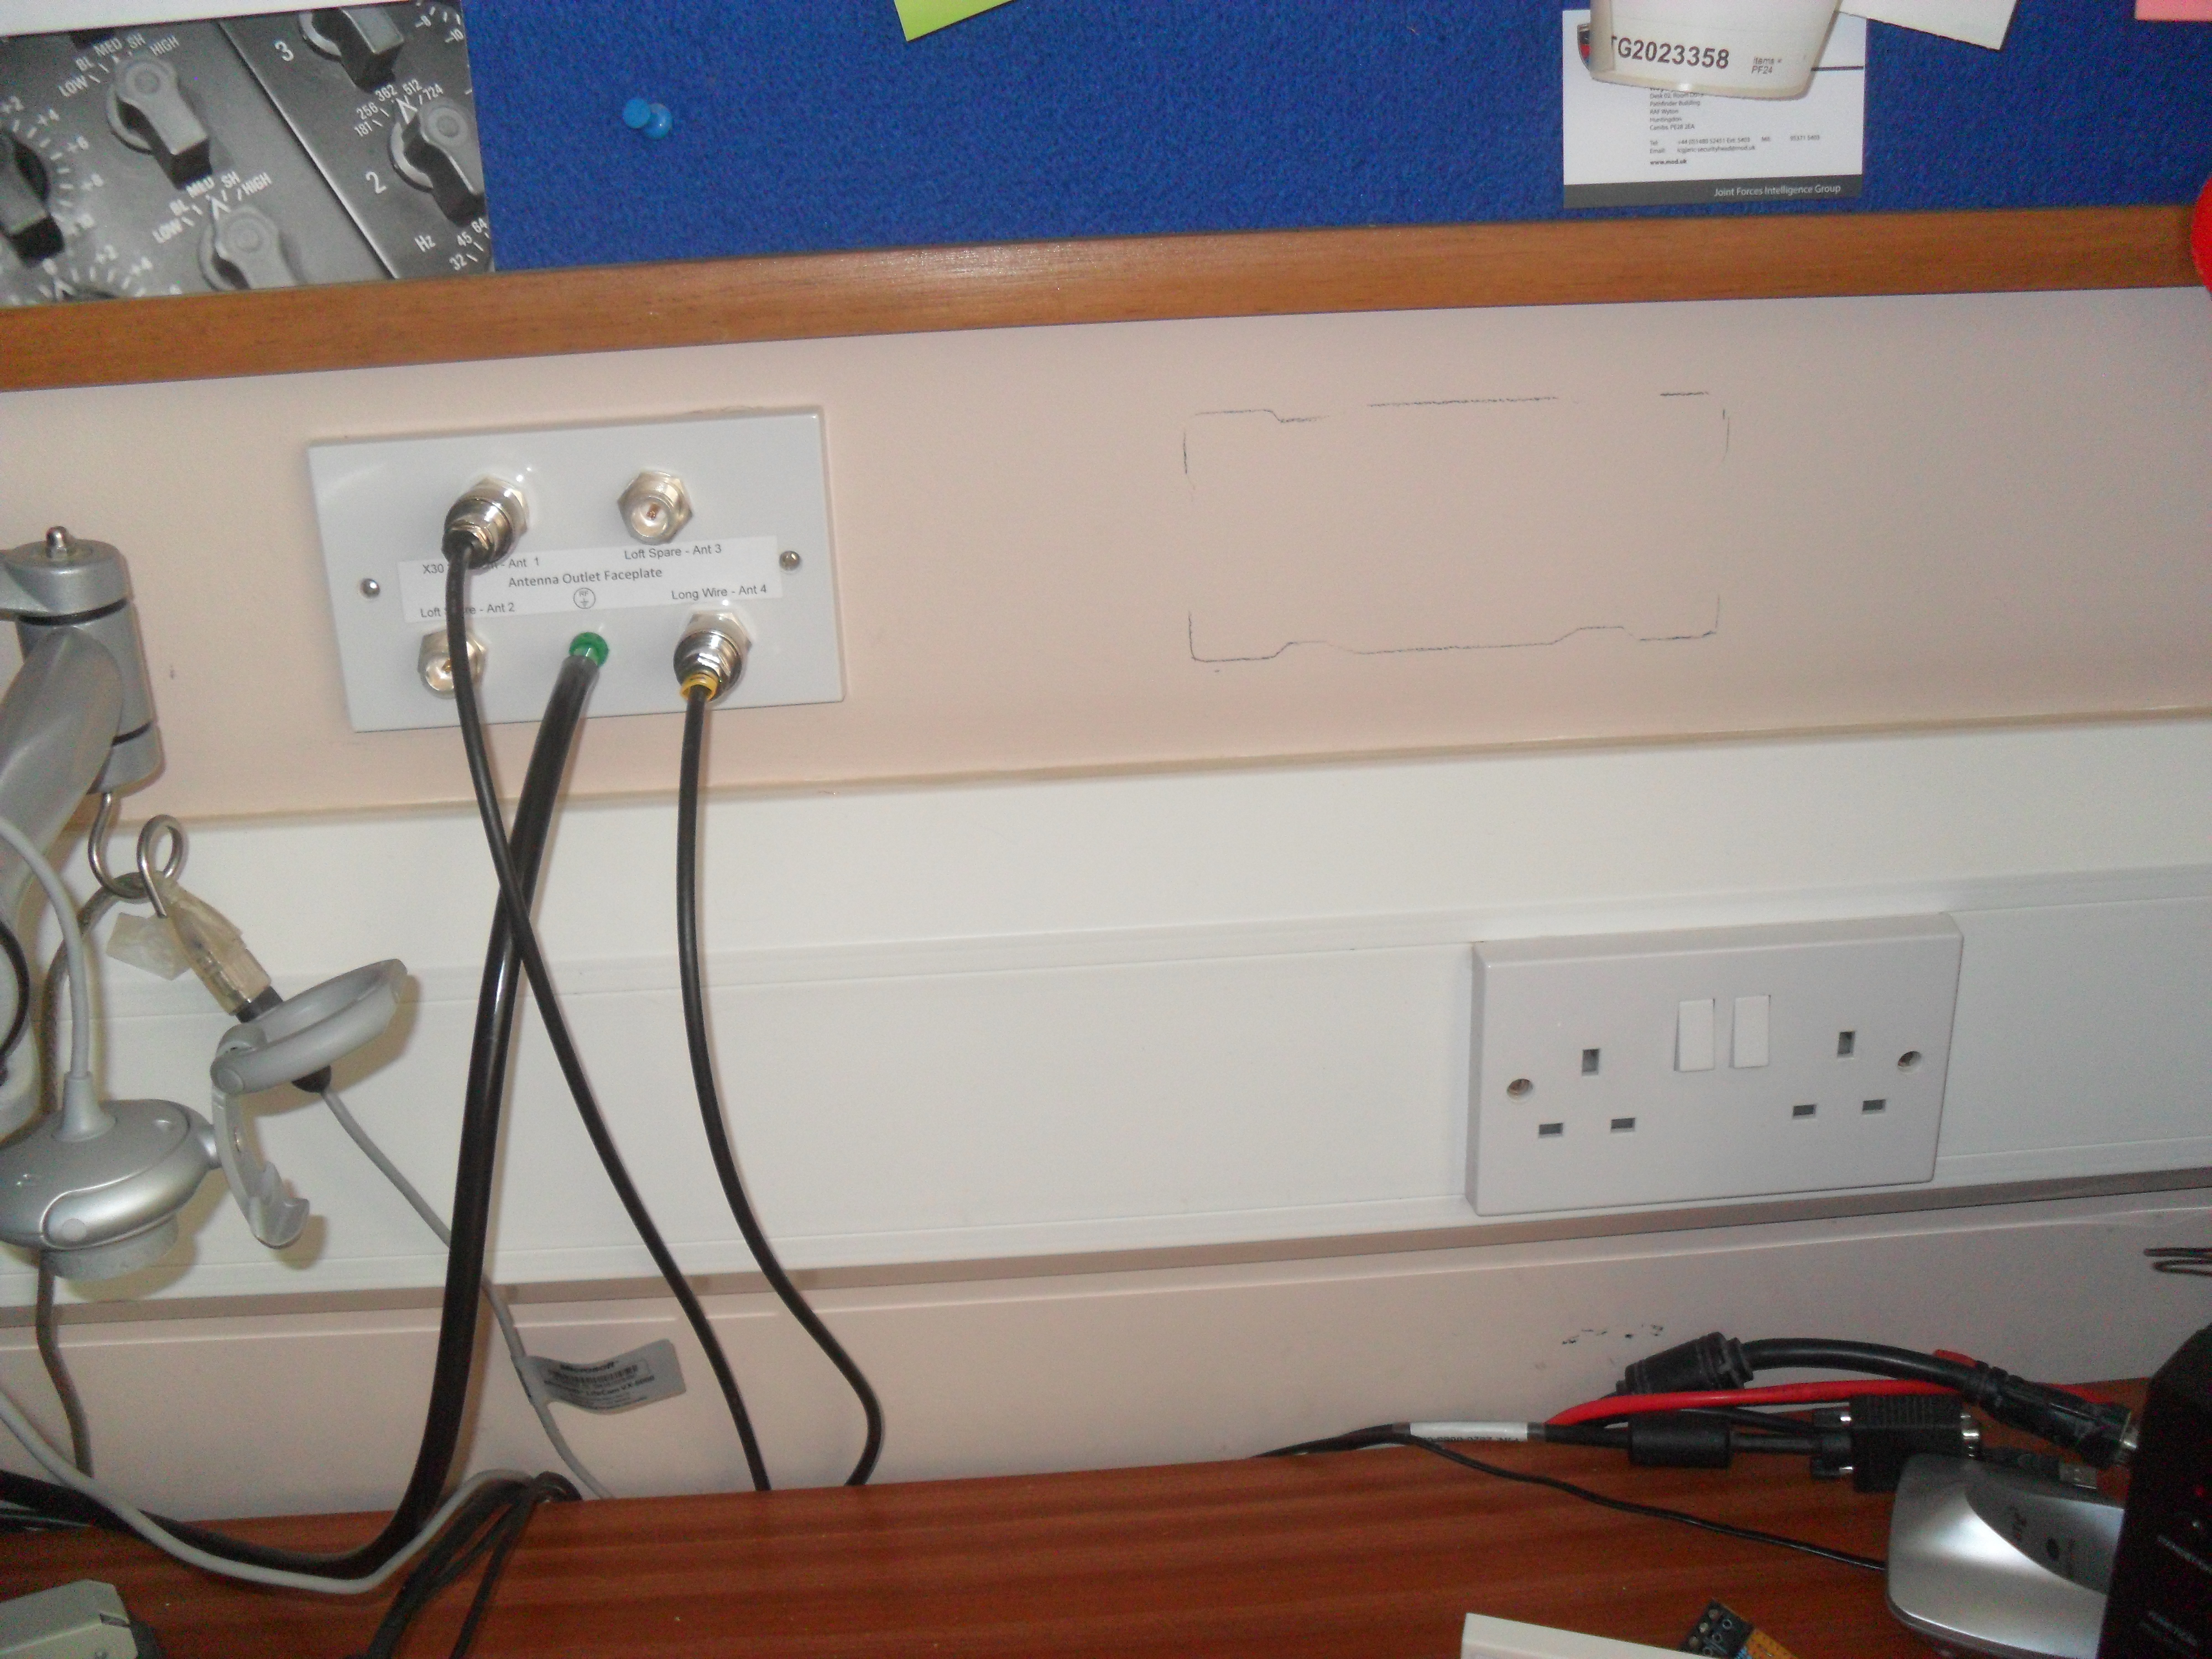
I had to modify the antenna connector wall bulkhead for the artificial earth to be effective as the original faceplate design earthed the incoming connectors via a copper plate with an earth stud which made contact with it, the modification involved removing the bolt and replacing it with an insulated banana plug socket, the connection to the existing 10mm2 cable was by using copper braid, again insulated so as to keep the grounding point to be the MFJ-931.
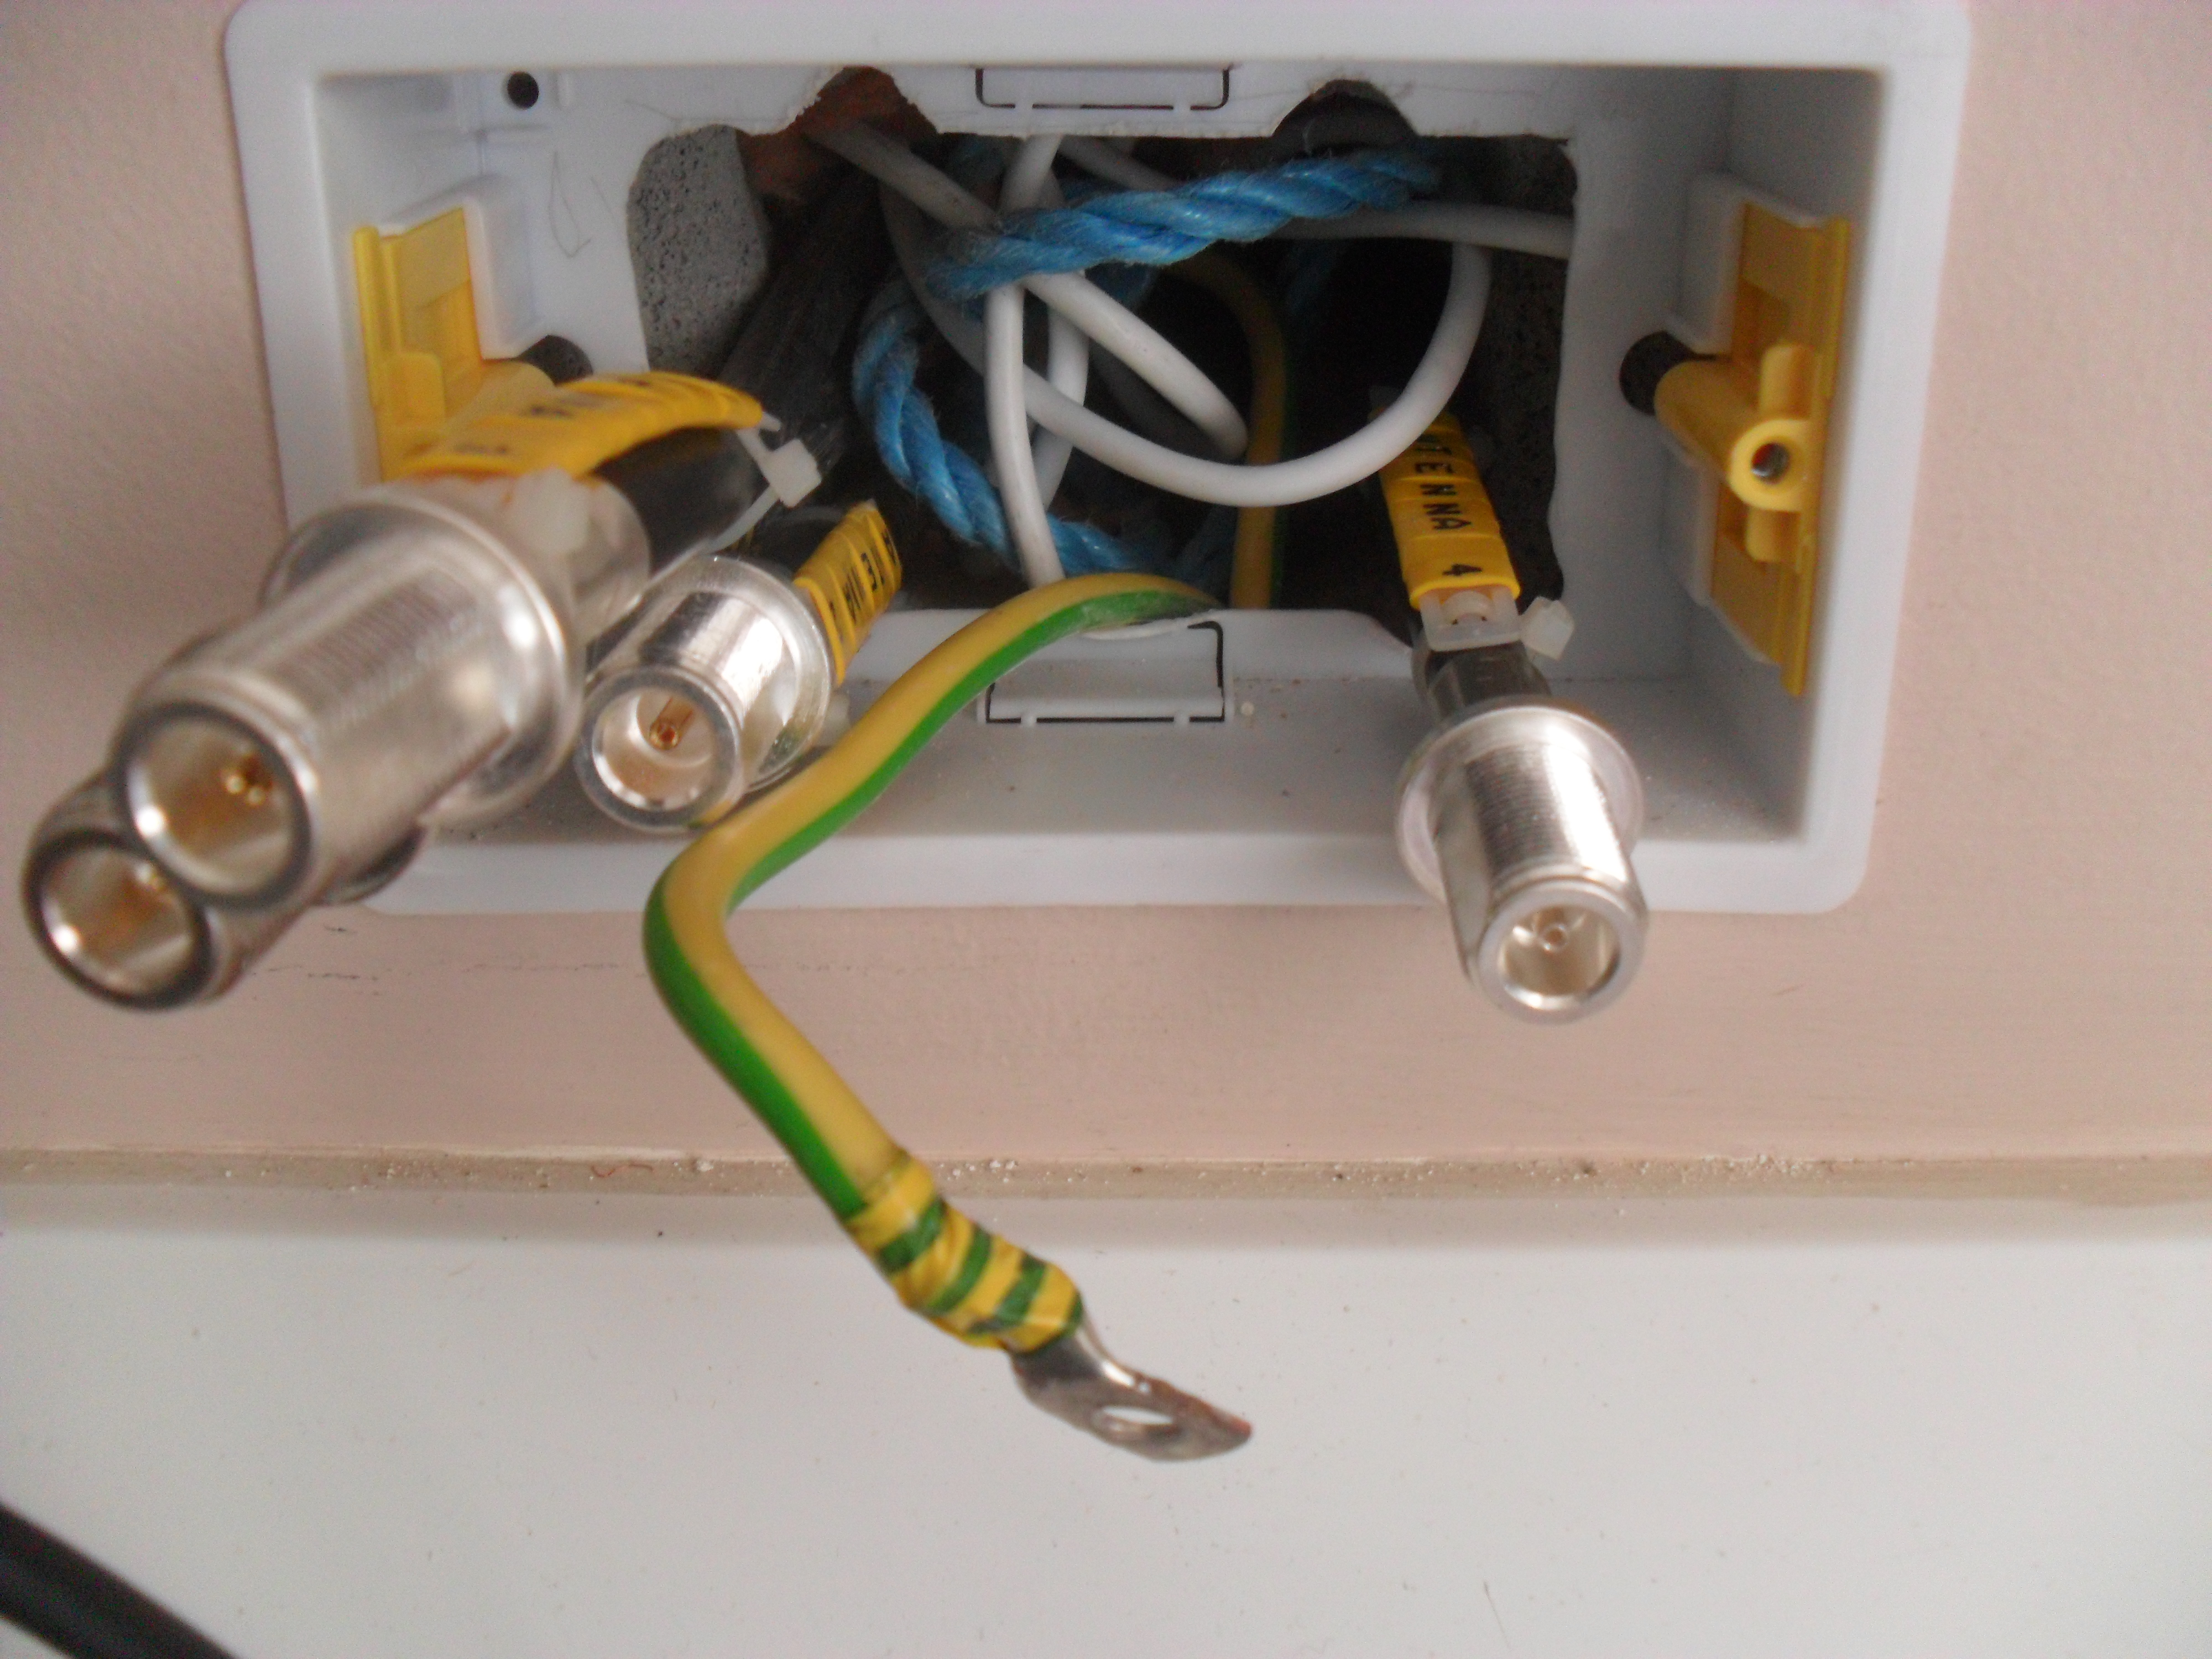
One change I made from the original antenna faceplate installation was to change the metal back box to a plastic dry ling type, this allows me to easily remove the box giving greater access. So I can dismantle the faceplate, I replaced the soldered SO259 sockets with crimped ‘N’ Type bulkhead ones and it has made a huge difference as I’m not constrained by cable length when I remove the faceplate.
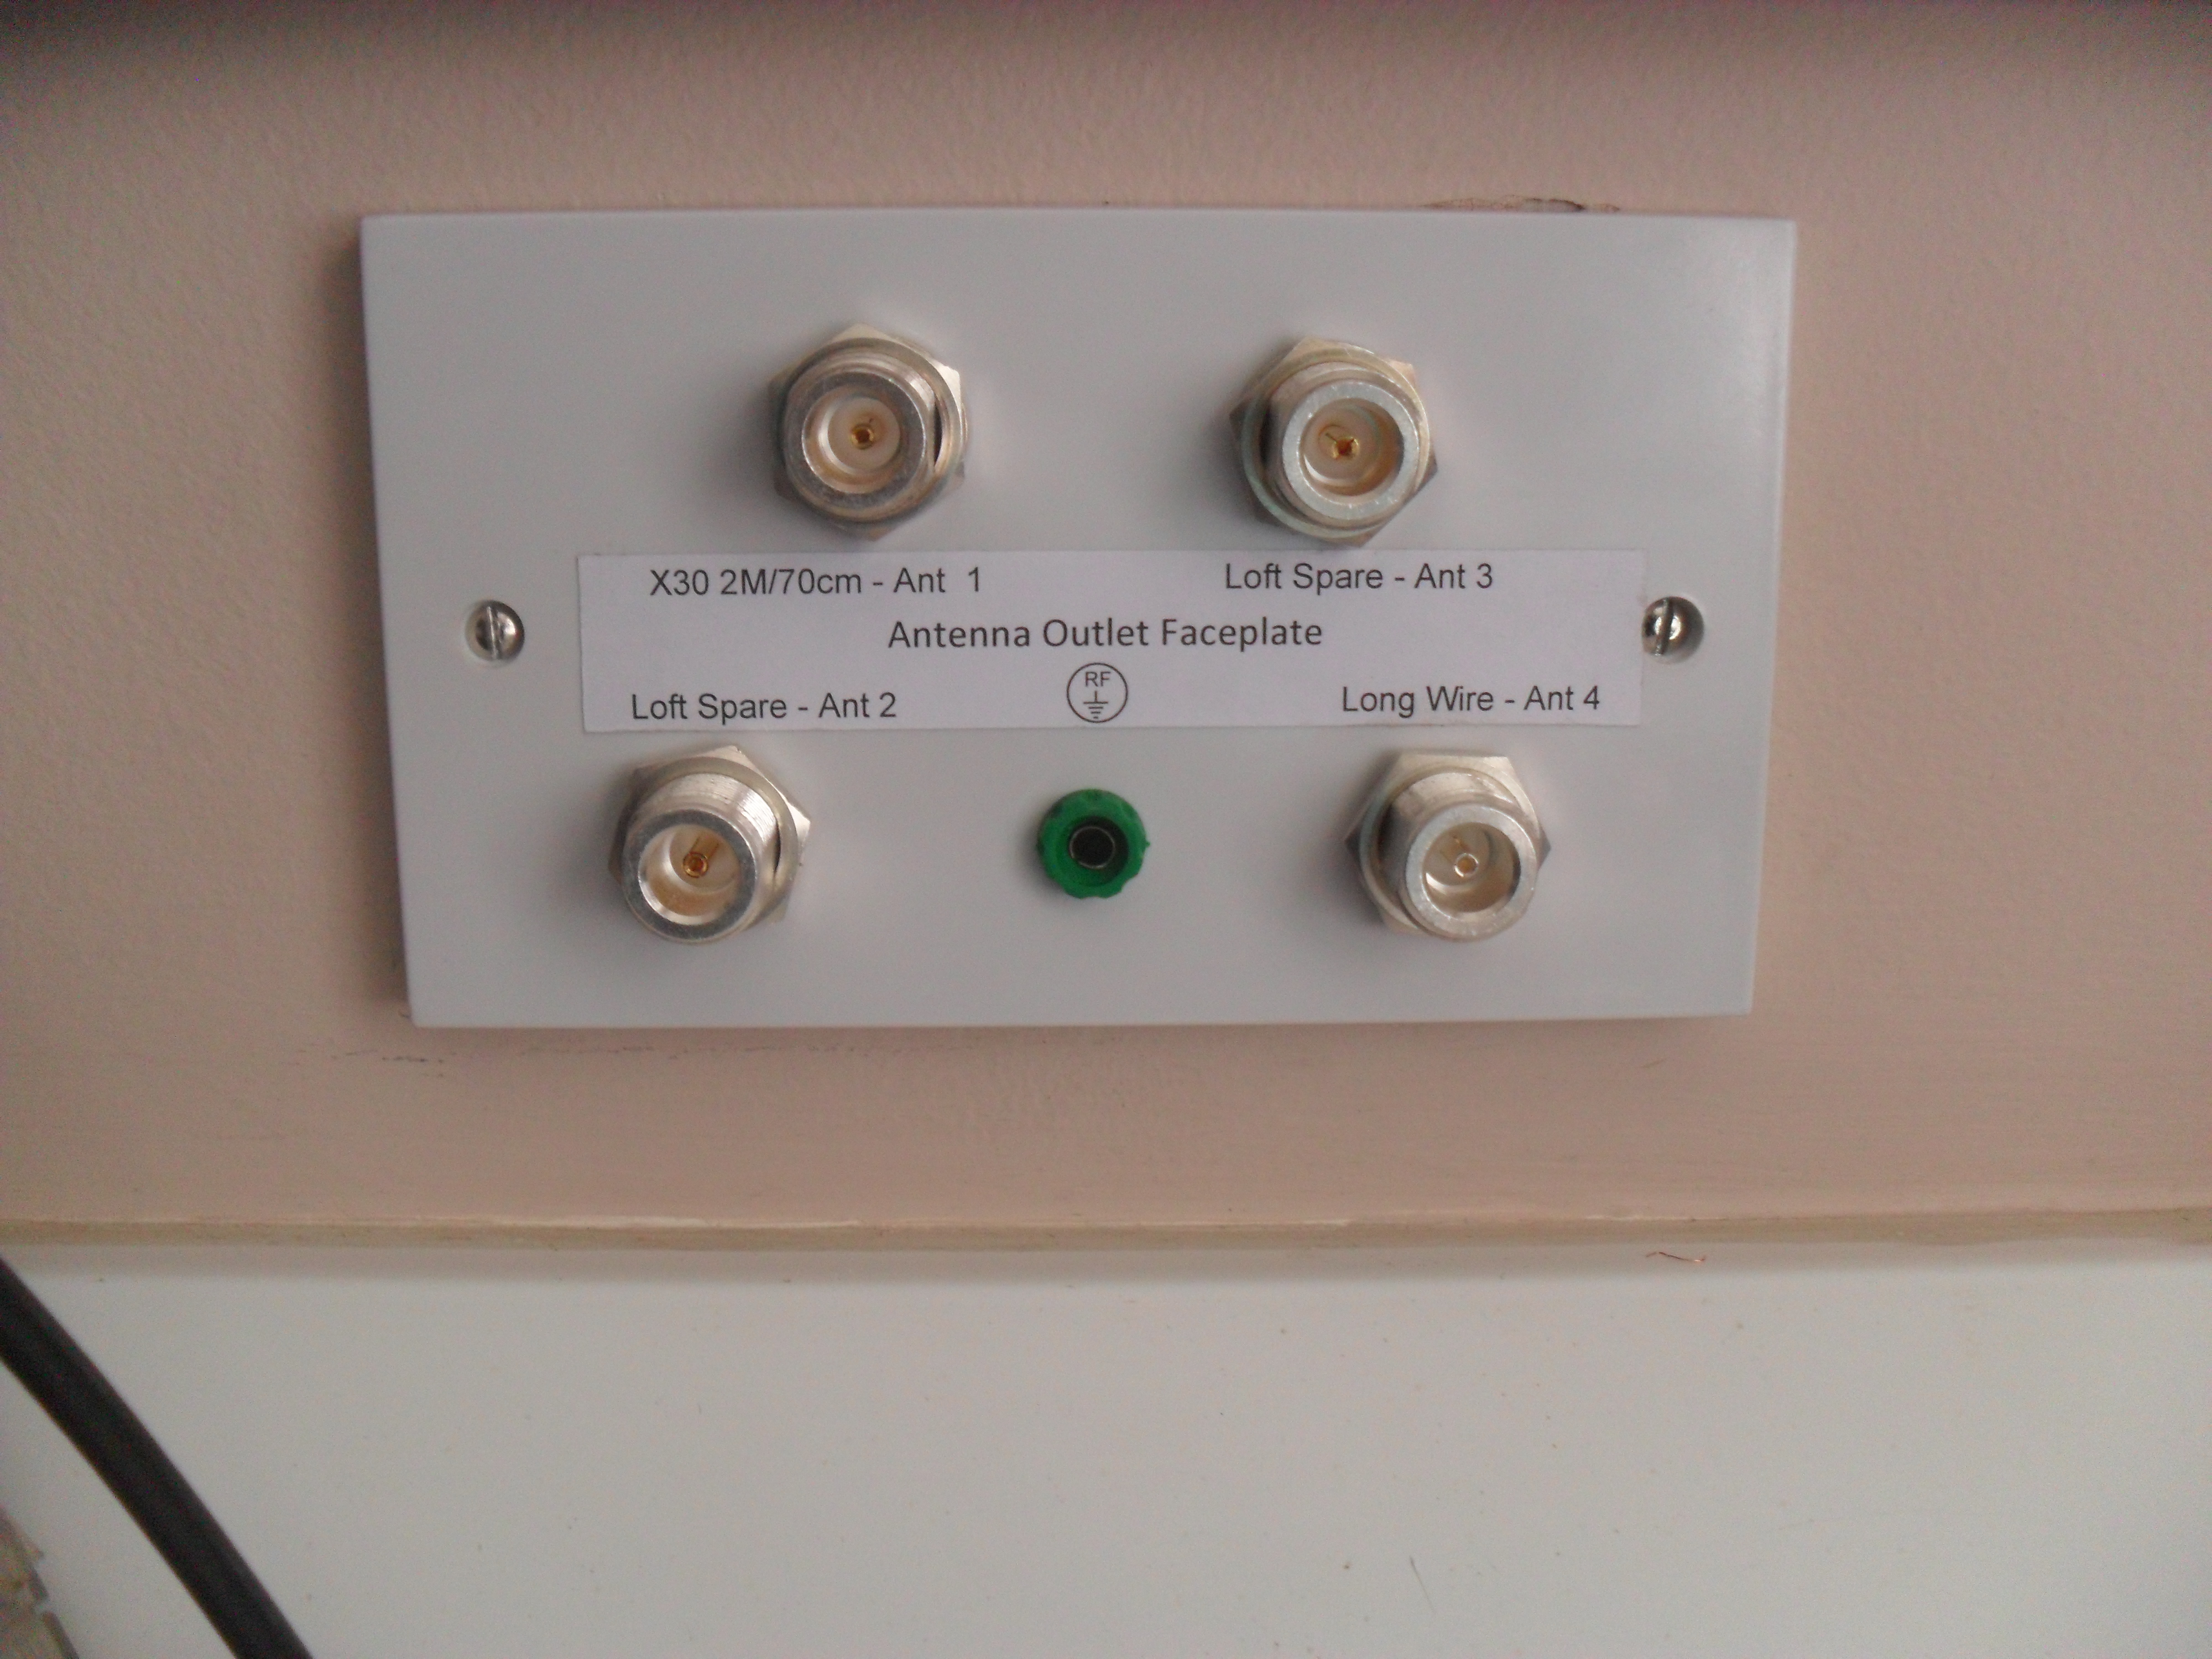
This is the antenna faceplate back in place.
I will know in the next few weeks whether or not this has been worth it when the external antenna goes up and I start transmitting, my license limits me to 50watts at the antenna, so it may well be that no problems are apparent until I start transmitting at a value greater than this in the future.
I recently installed Ham Radio Deluxe software, this software allows remote control of my rig as well as a whole host of other functions and features, working through these I stumbled across a neat little feature, that is the ability to automatically post to your web site details of the frequency, mode and time last seen using the rig at regular intervals, I retained the default of every 5 minutes.
An example of the output can be seen here on my site.
Setup is fairly straightforward, the main details you must have are your host upload details and password, I use Notepad++ to edit and create pages, using this I added the following text and saved as radio.html:
2E0DDI was last seen on frequency ###-frequency-###MHz using ###-mode-### mode with a Kenwood ###-radio-### Multi Band Transceiver at ###-timestamp-### – Data automatically updates every 5 minutes when using Ham Radio Deluxe Software.
Once Ham Radio Deluxe is downloaded and the connection and control is established with the radio, go to Tools >> Web Page Updates.
In this panel, enter the location of the html document previously created, your host name, directory you want to upload the document to, (I simply placed it in the root directory – /web), fill in your user id and password, then press the test upload button, if all is well, the detail box will show success, if transfer fails, re-check your settings.
Hopefully your still with me :-), so the next bit is to insert the information which is being uploaded into your web page, the raw information looks like this on my site.
Where you want this to display, add this to the page using iframes –
iframe src=”http://www.your web site/radio.html” frameborder=”0″ width=”700″ height=”75″>/iframe>
In order to show the code I had to remove the < from in front of the first iframe and also in front of the ending /iframe – place the < back in front for the frame to work, (if I’d left the < in, you would have seen a blank frame in the blog page as the information was trying to be gathered from a non existent source of www. your web site) That’s it, hope you found it useful, the feature does only work when you are working through the Ham Radio Deluxe software, but it is quite a nice addition to your site. When I get my antenna sorted, I will add a contact log to my web site, again this can be automated through this software. 73
Added an new page which gives an indication of how susceptible woodland is to fire, this will also be of use to folk who own straw bales and such like.
The index is derived from the State and New Zealand but is also used in Canada so some of the terms used are fun to google.
As I want a relatively discrete antenna arrangement for my radio ham interest, I have opted for a single random length wire with automatic tuning being dealt with by a SG-237 tuner, Part 2 of this blog will go into the fixing details of the antenna and hardware.
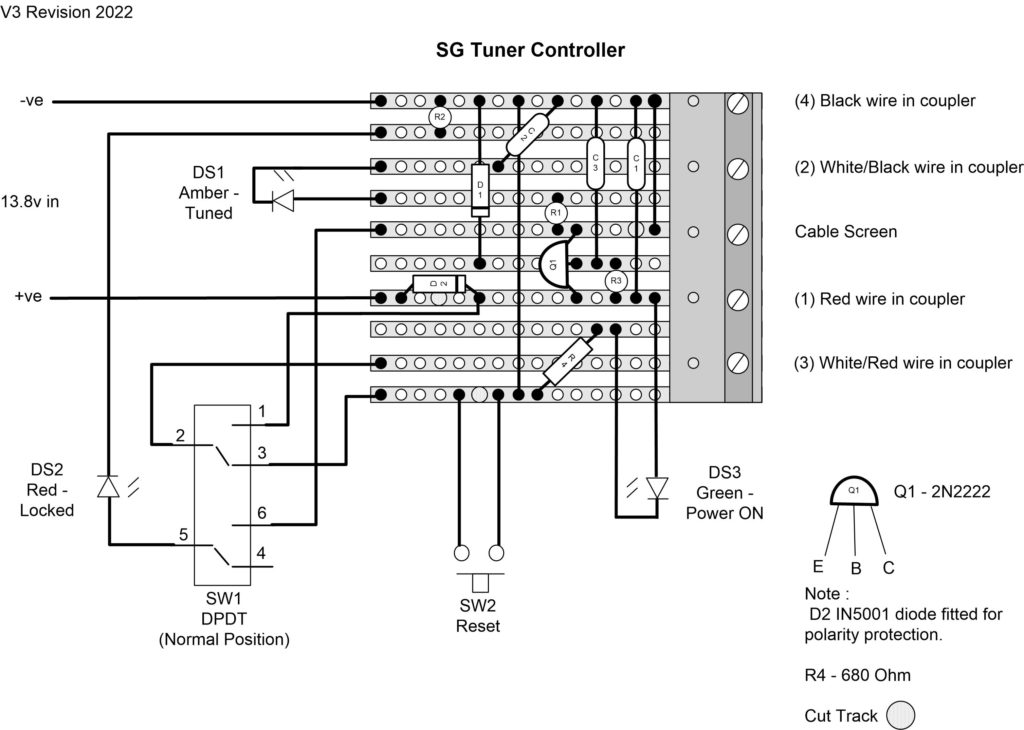
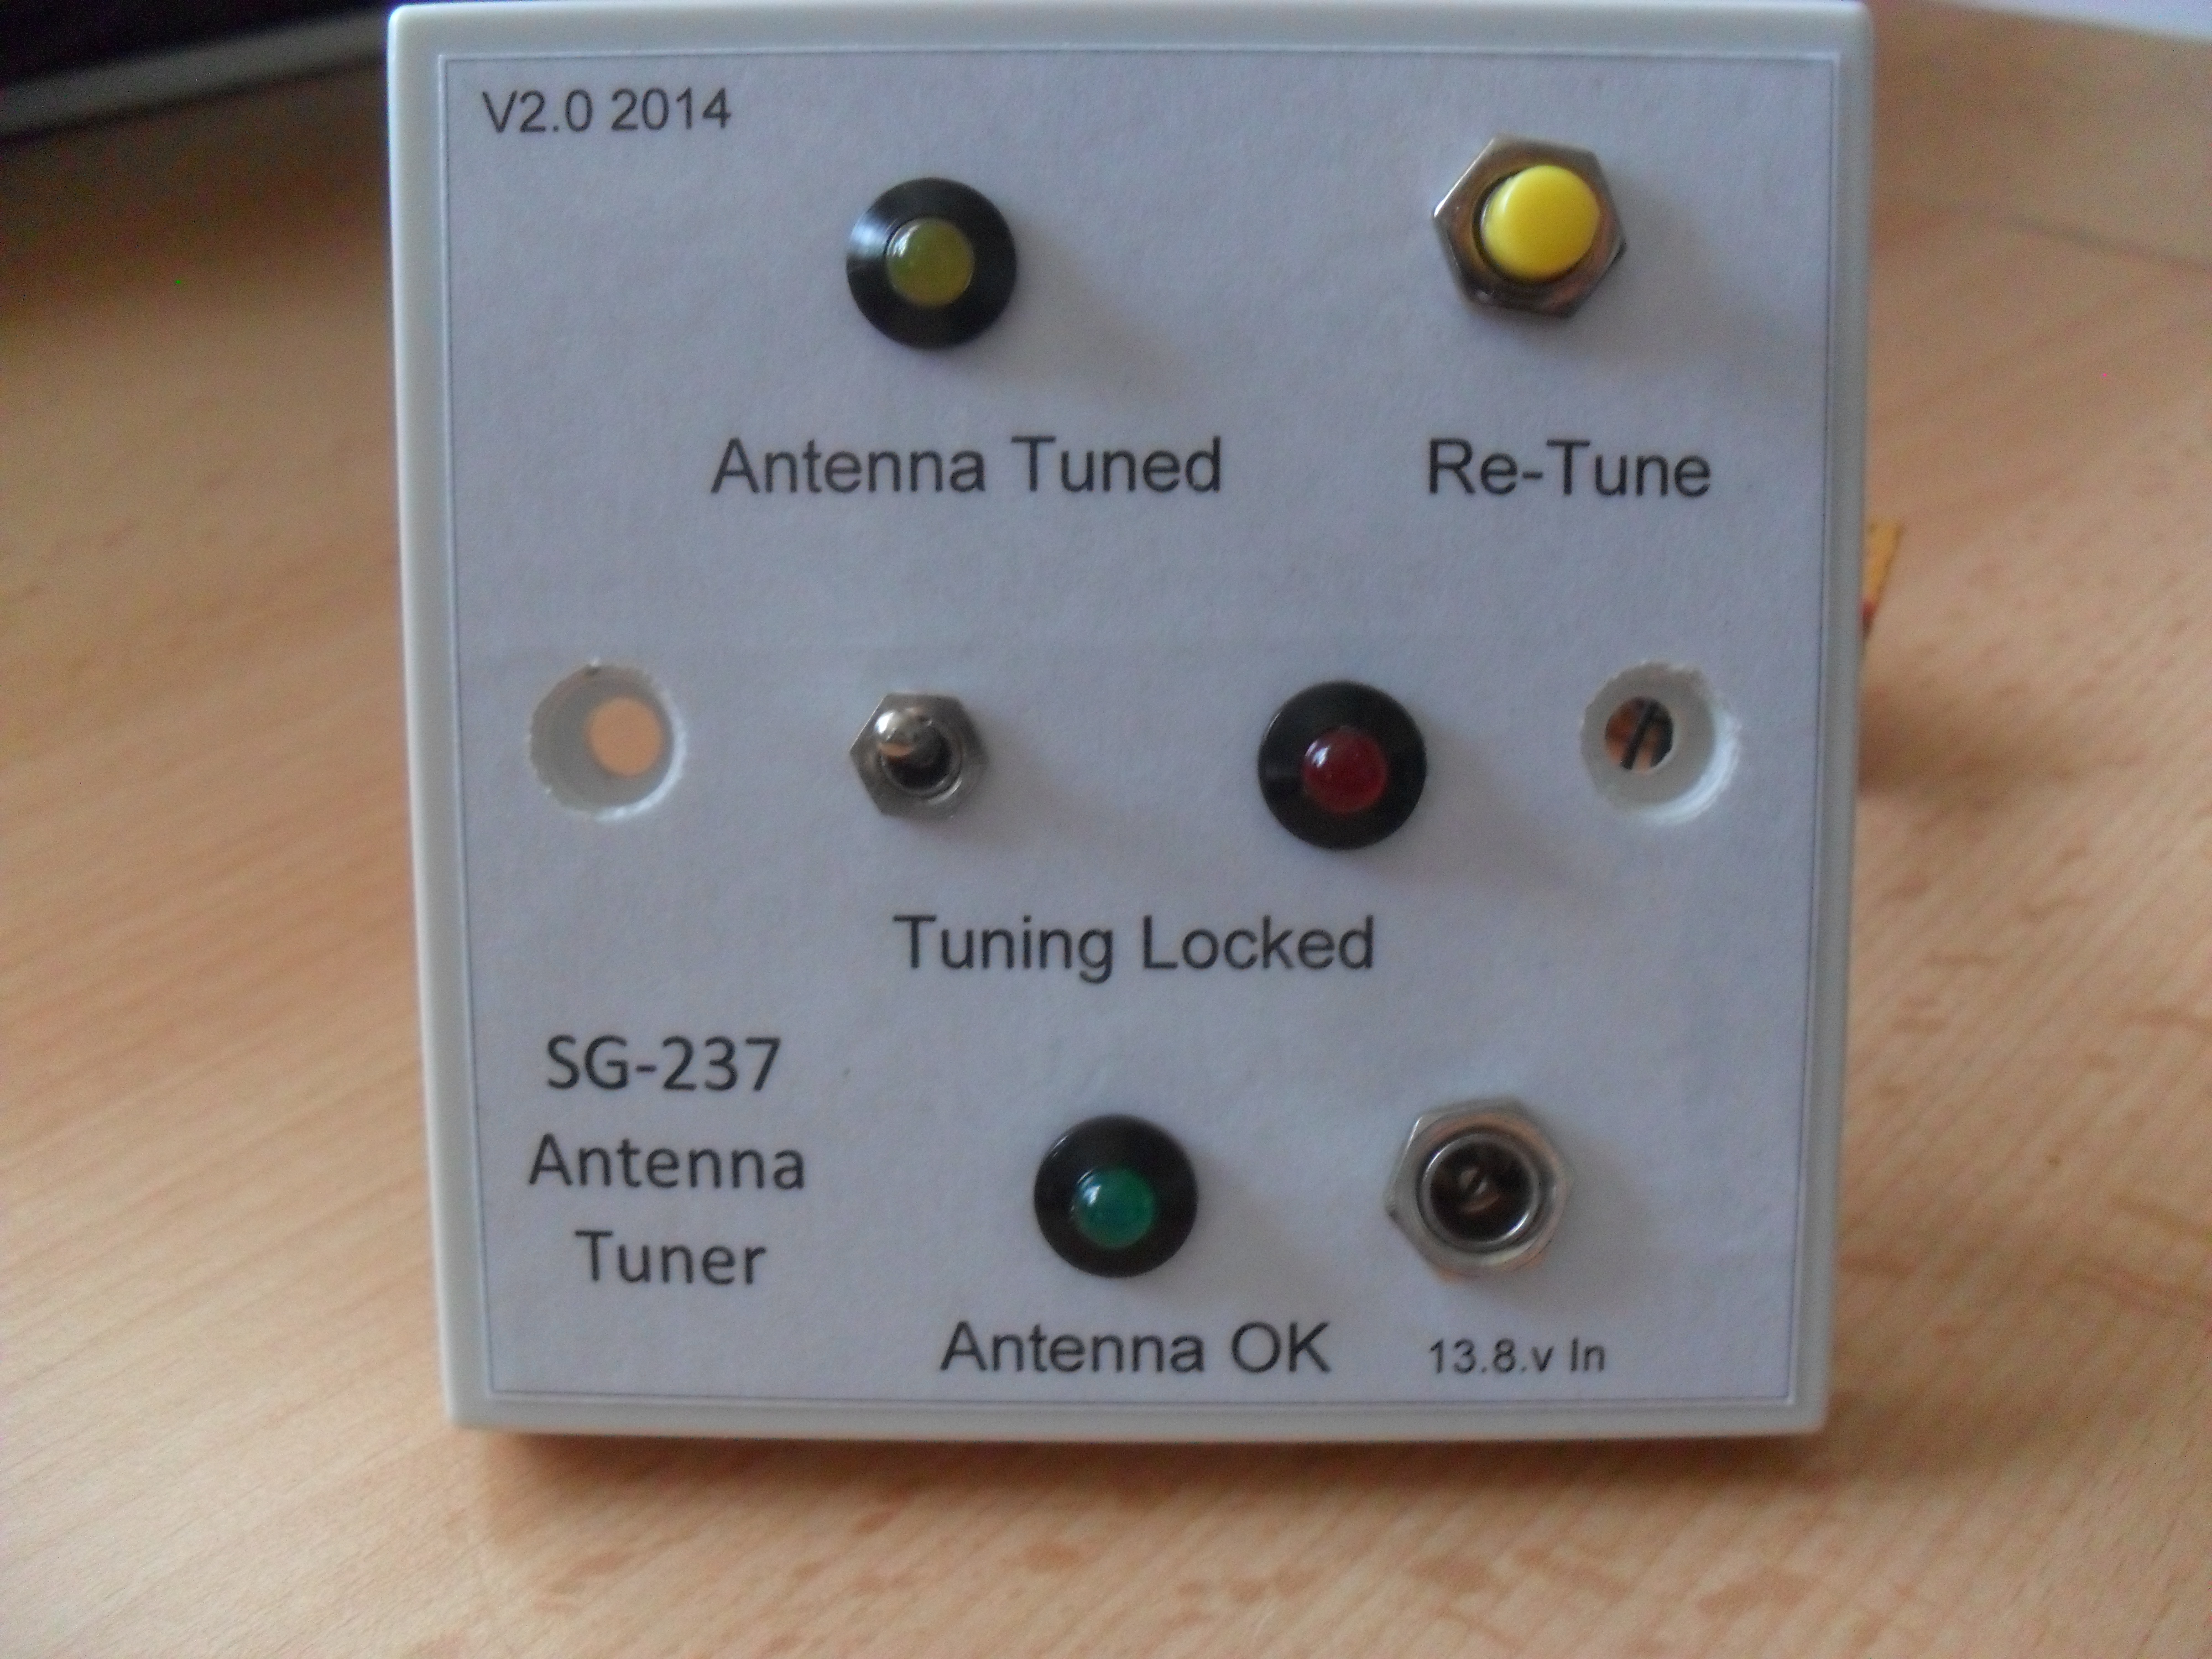
I have made a tuner control unit out of a single gang blank faceplate, although this is not required for the basic installation, it will give me some control and confirmation indications at the shack end of power and that the tuner has finished tuning.
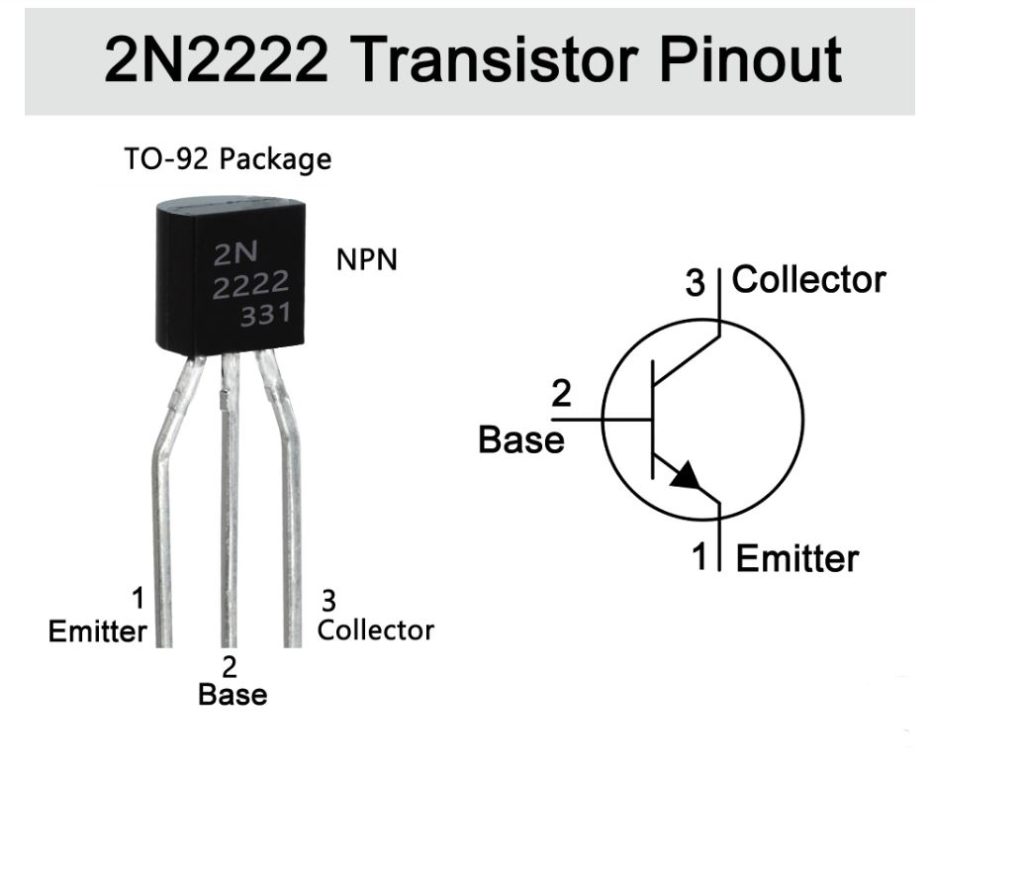
The schematic I followed with the exception of the polarity protection diode and Antenna Available ON led, is within the manual available from SG Tuners, I used an small offcut of veroboard to make the unit and this will be inside a backbox, the faceplate displays the lights and access the controls.
The veroboard layout is shown here.
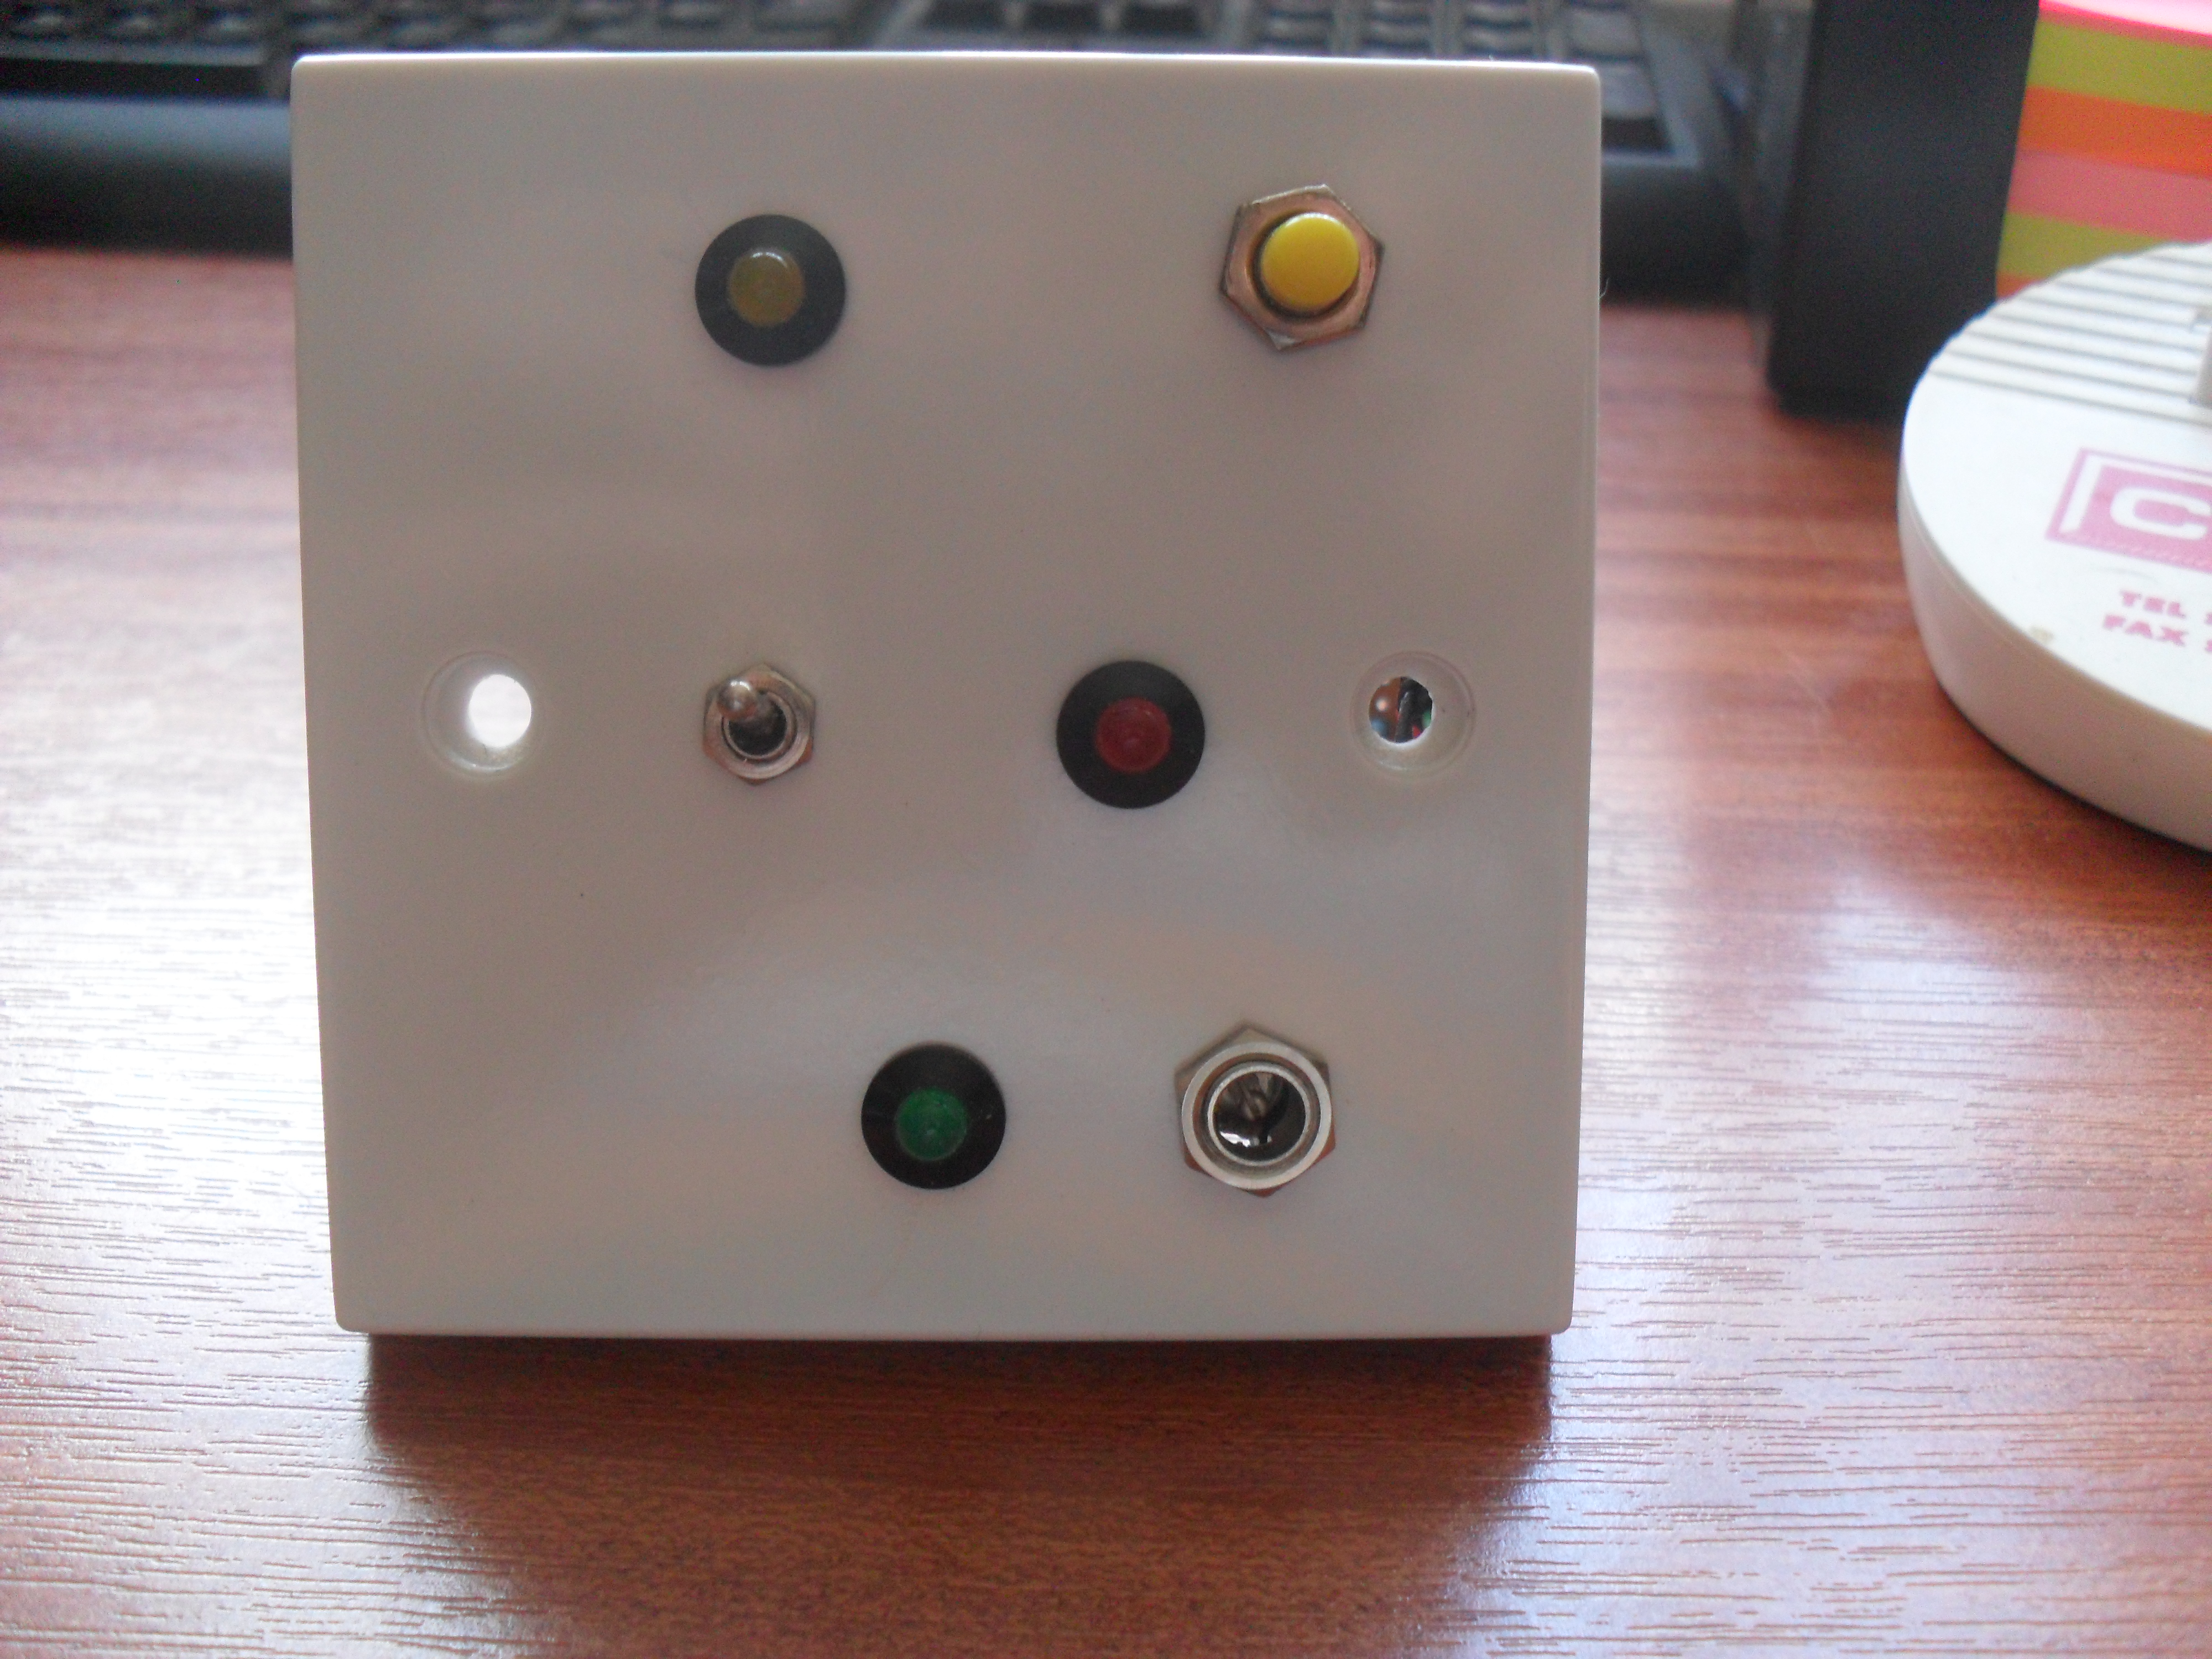
This is the unit fully assembled but not yet labeled, holes were drilled will a hss bit on a slow speed, letting the drillbit do the work with little pressure, I bought off ebay a Dremel copy, and used the grinding bit to gently open the holes to the right size and also to grind down the faceplate support ridges:
Labeled unit ready for installation, the label is made in Word or Visio to the right dimensions, printed to plain paper and cut slightly oversize, the reverse of the paper then has double sided self-adhesive tape applied, the front of the label then has a clear self adhesive covering applied (the sort of clear covering you would use for school books), I used a sharp knife, steel rule and cutting mat to cut just inside of the second outer boarder of the label, I printed a double border in case I made a hash of cutting it the first time, at least I could have another shot.
Once the label was ready, I striped down the faceplate, lined it up and carefully stuck it to the faceplate, to cut the holes, I held the faceplate to the light and used the knife to starburst the holes before going round the edges to clean up.
I have added an led which will light when the longwire is NOT to ground, the transfer will be done by a mechanical knife switch, the switch is a double pole double throw, one contact pole will switch the antenna wire from the SG-237 to ground, whilst the other pole will switch the Anntena Available led, credit goes to Bill O’Neil, KW8KW for a simple but effective solution to what could be a costly problem.
INSTALLATION IN SHACK
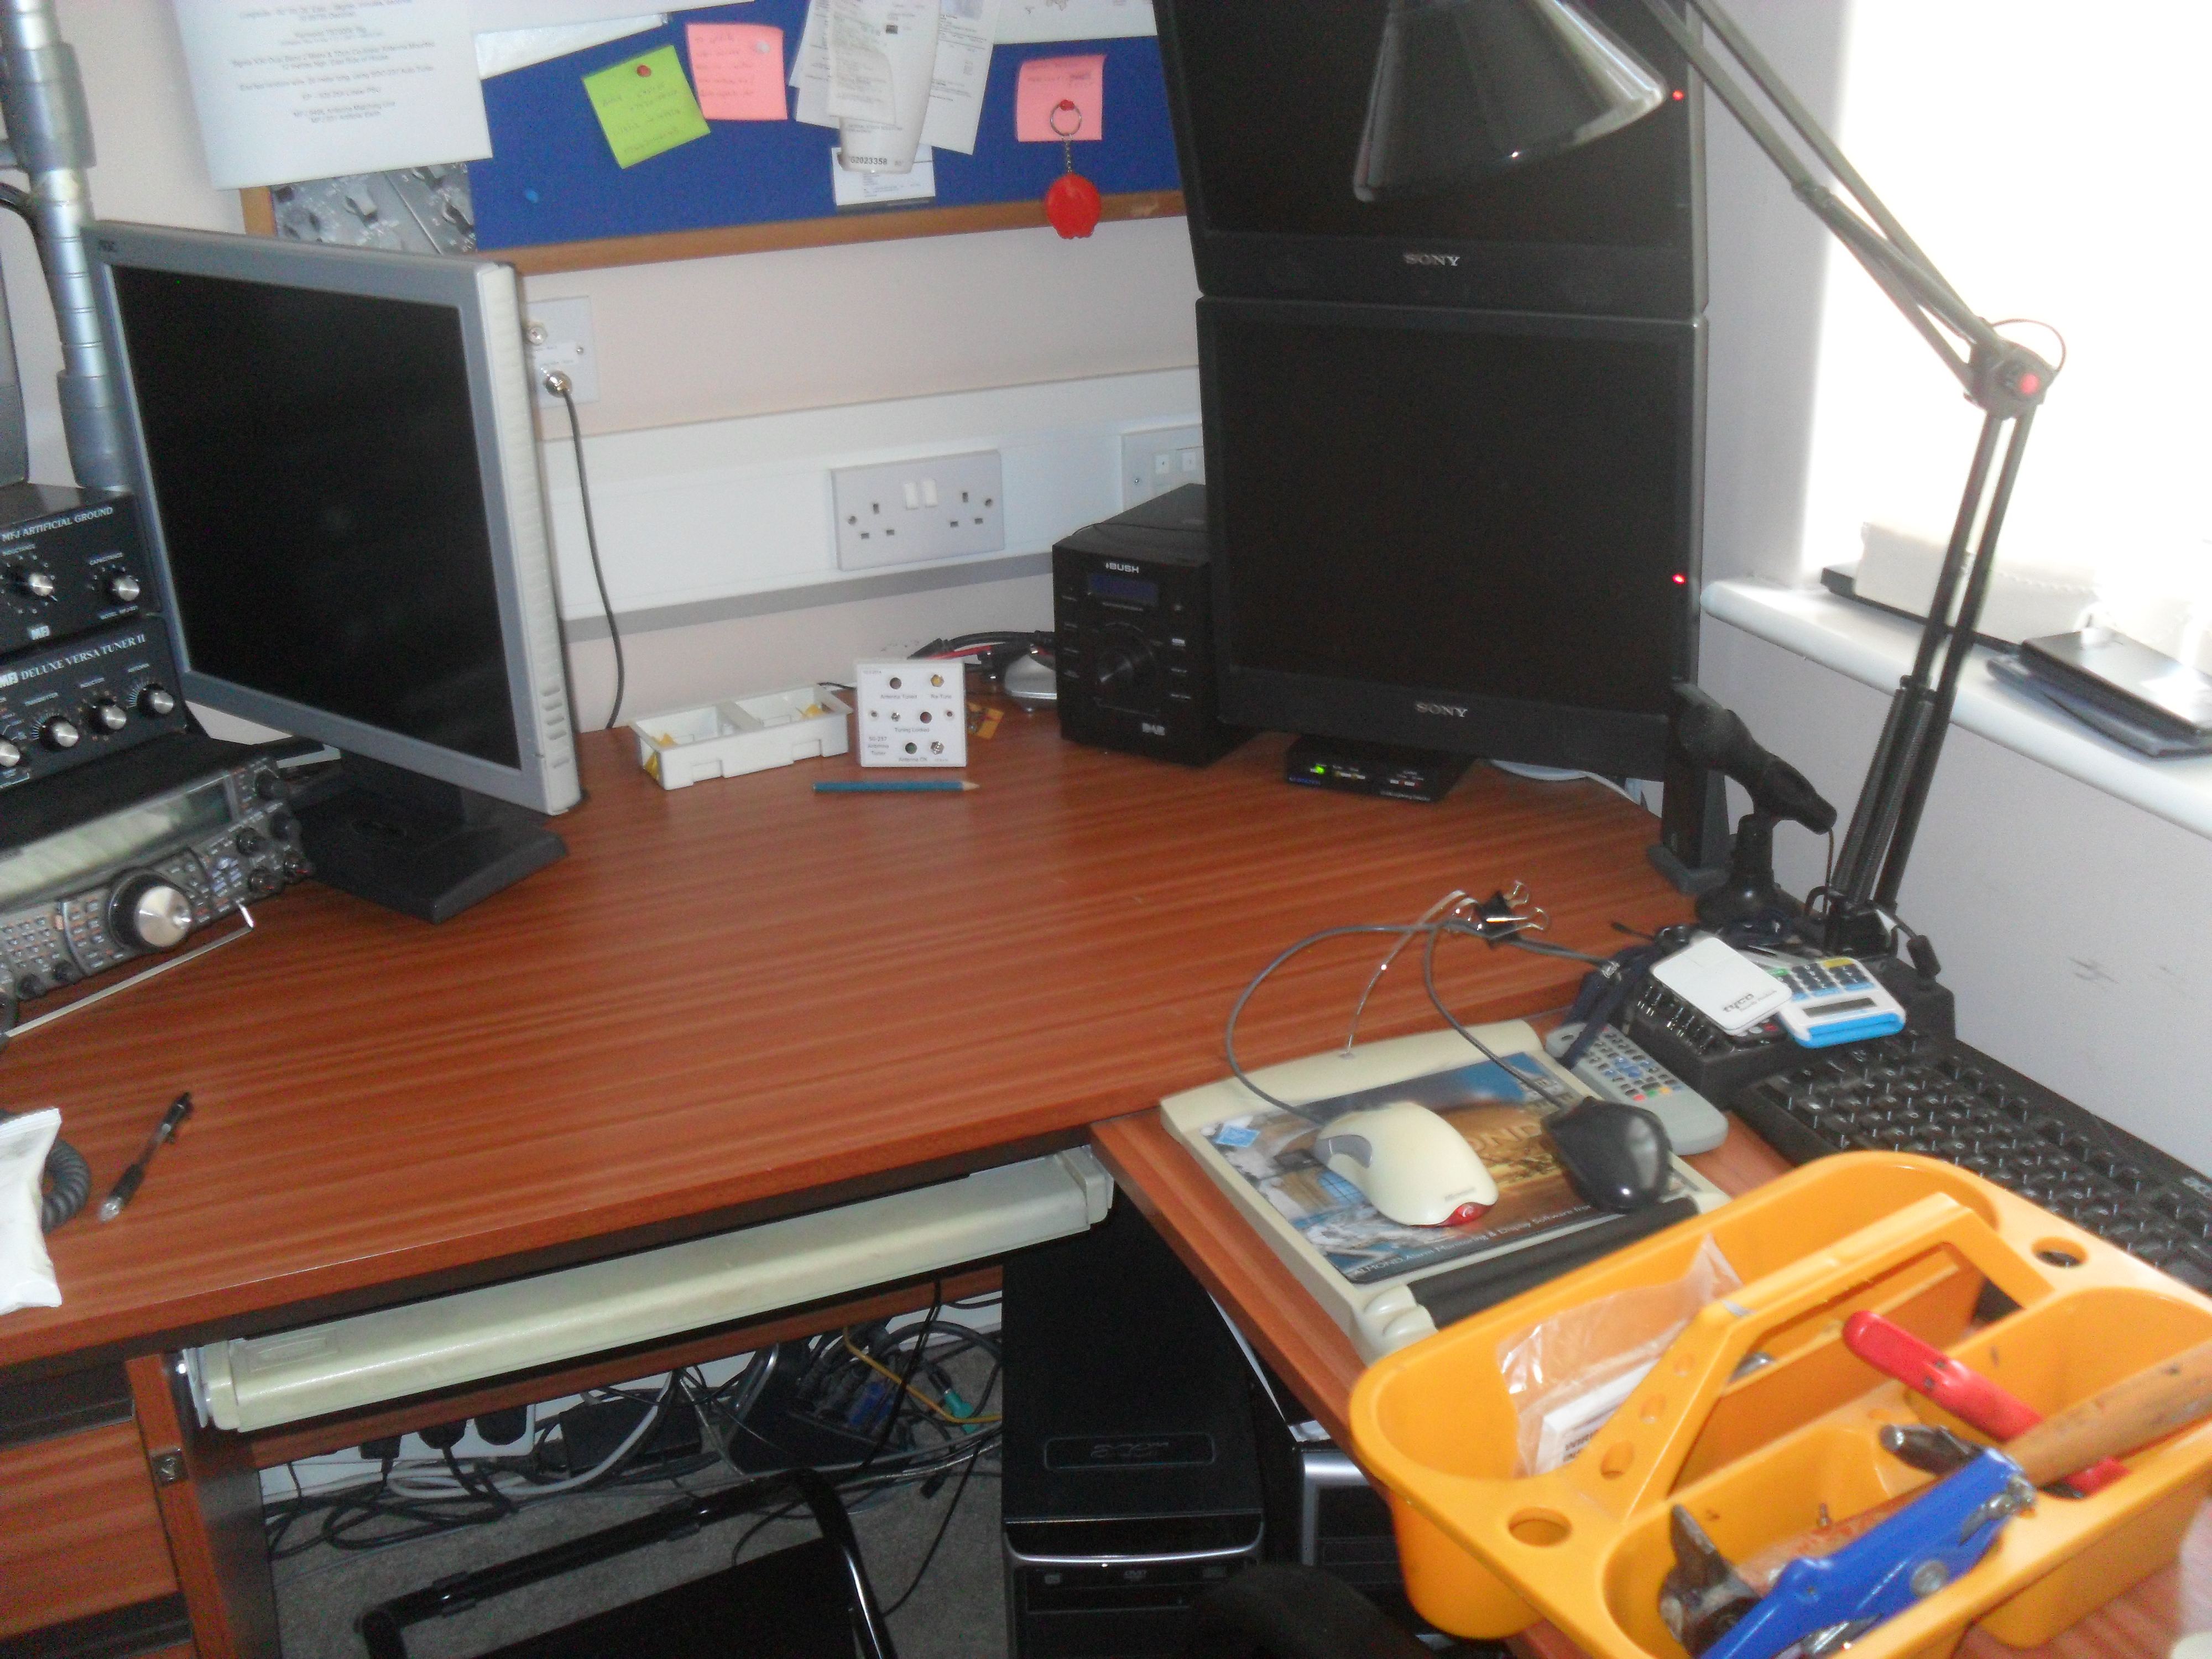
I opted to fit a double dry lining box and to have once side blanked as a spare for future use, the positioning of the tuner control was important as I did not want the display obscured by the PC monitor.
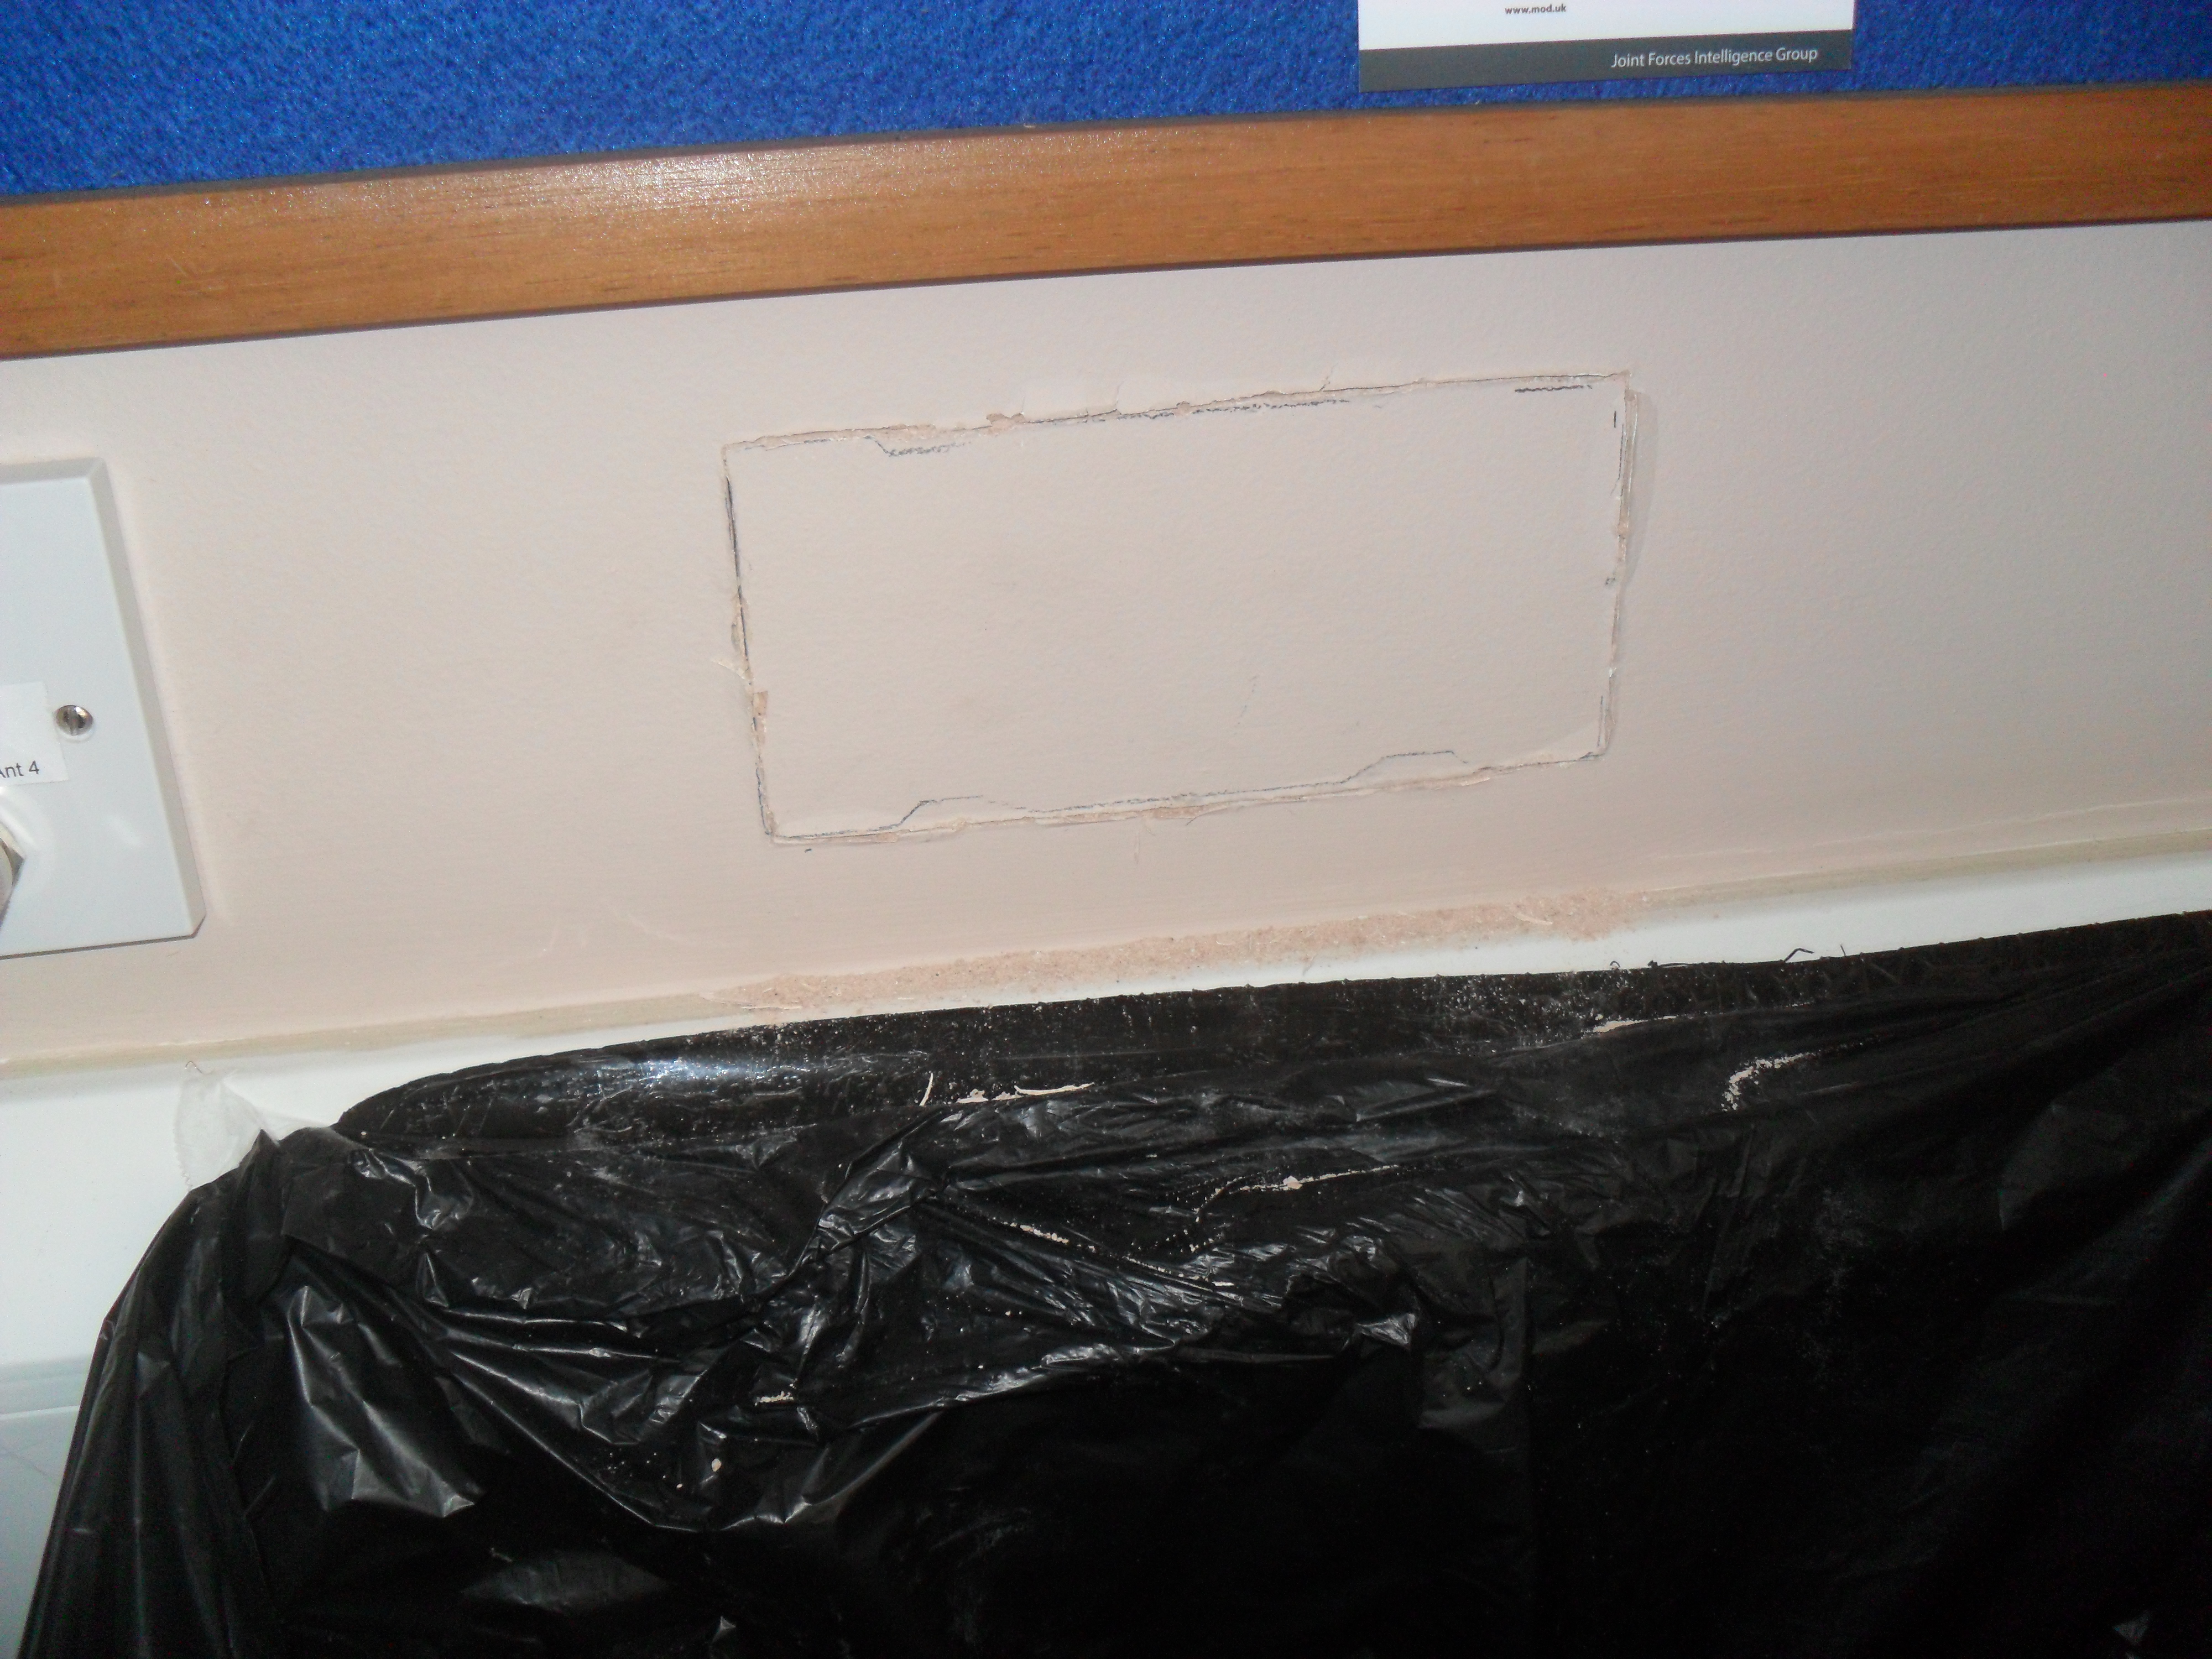
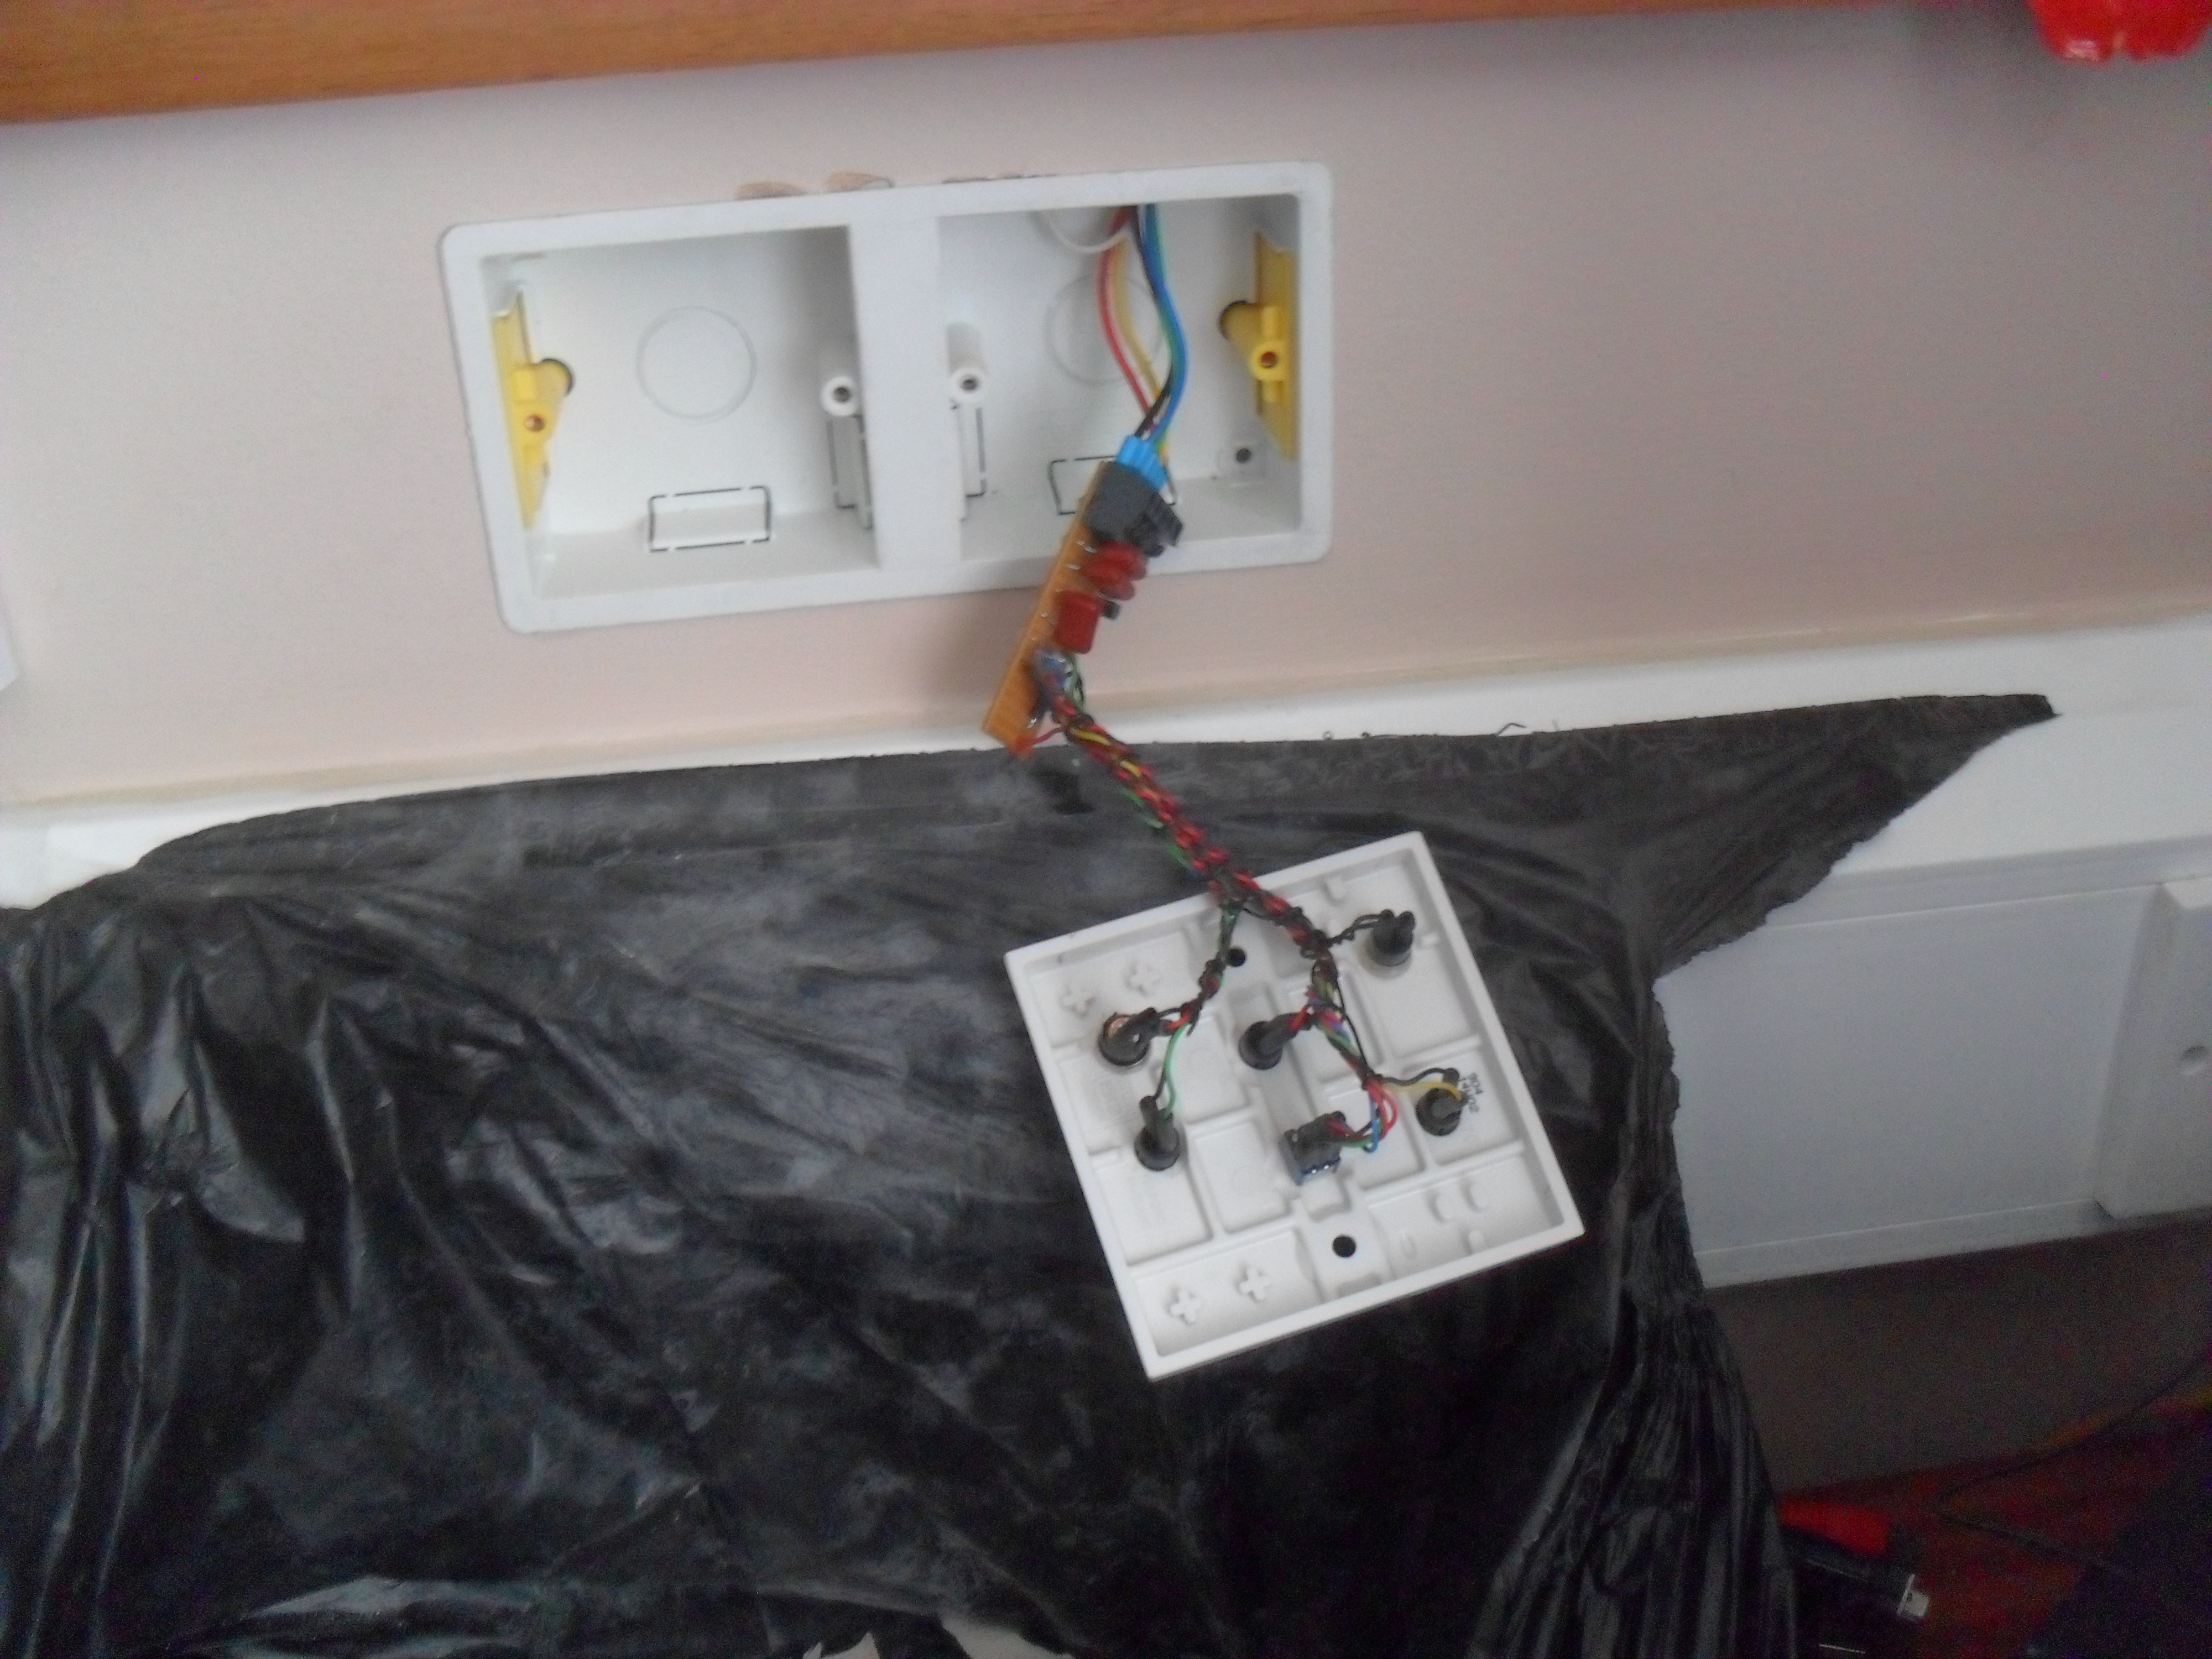
I started by clearing the area:
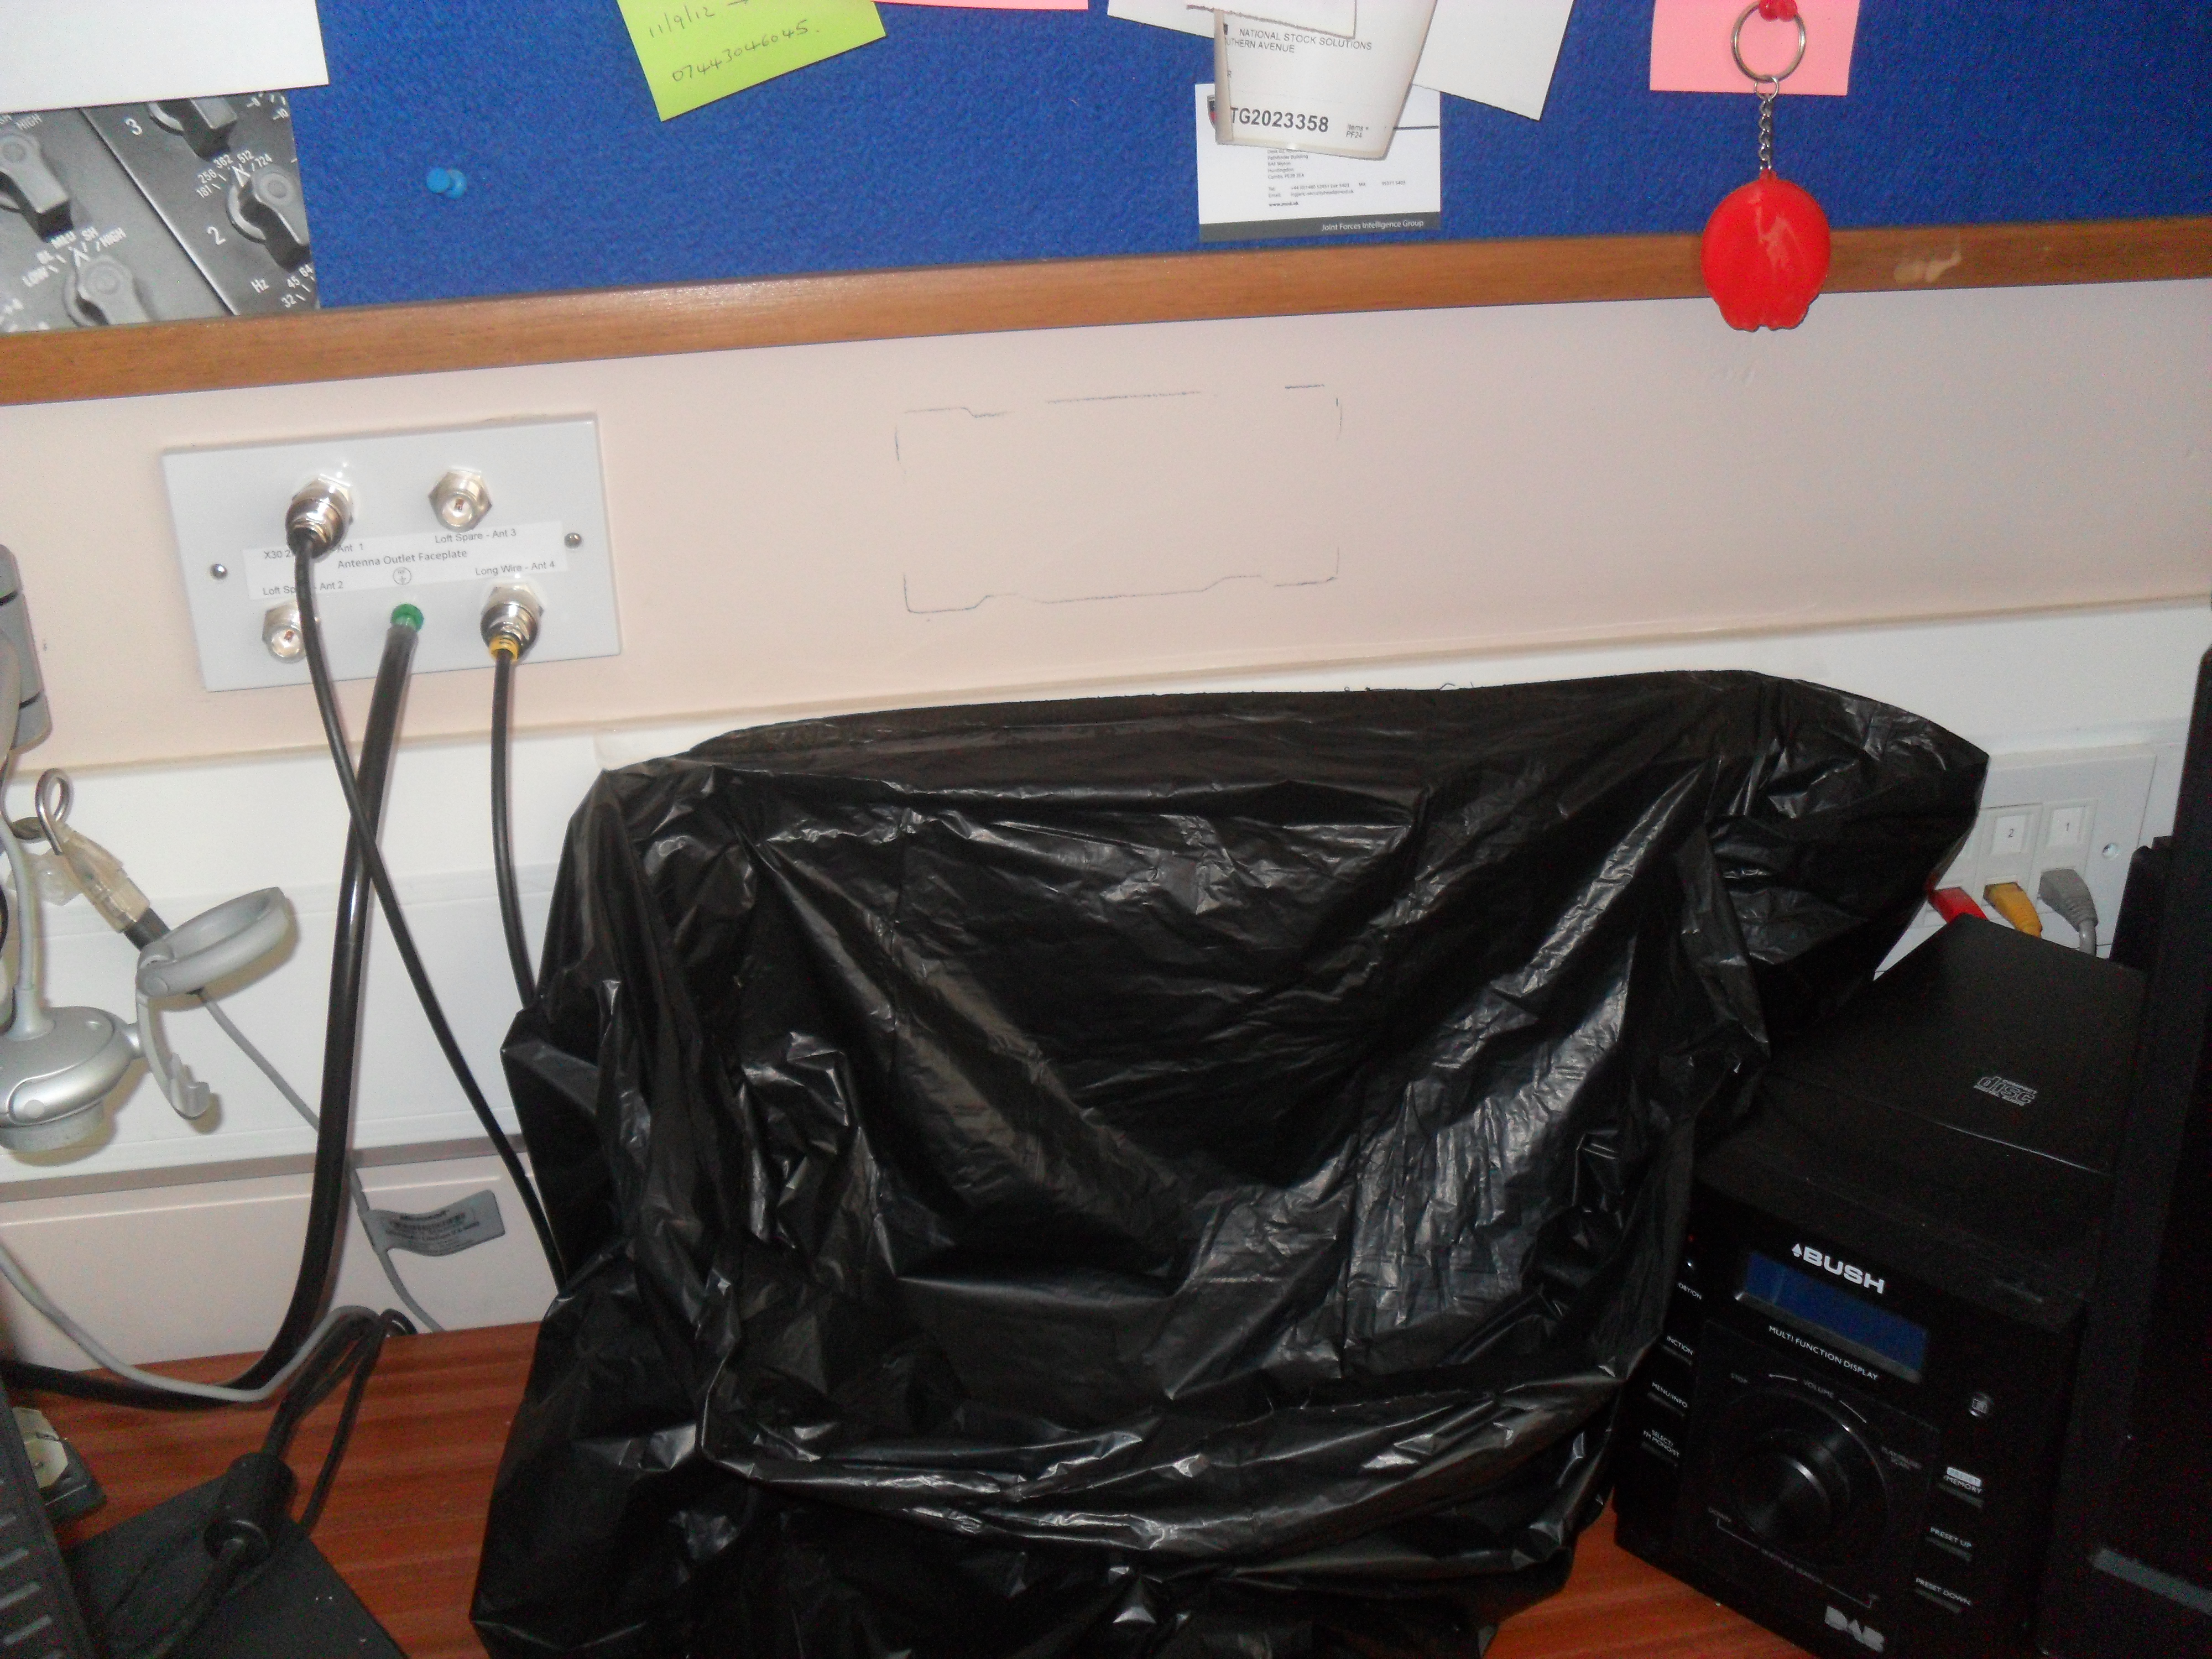
Offered the backbox to the wall and leveled it with the existing antenna faceplate:
Bin bag opened and taped to the dado trunking ready to contain the majority of the mess:
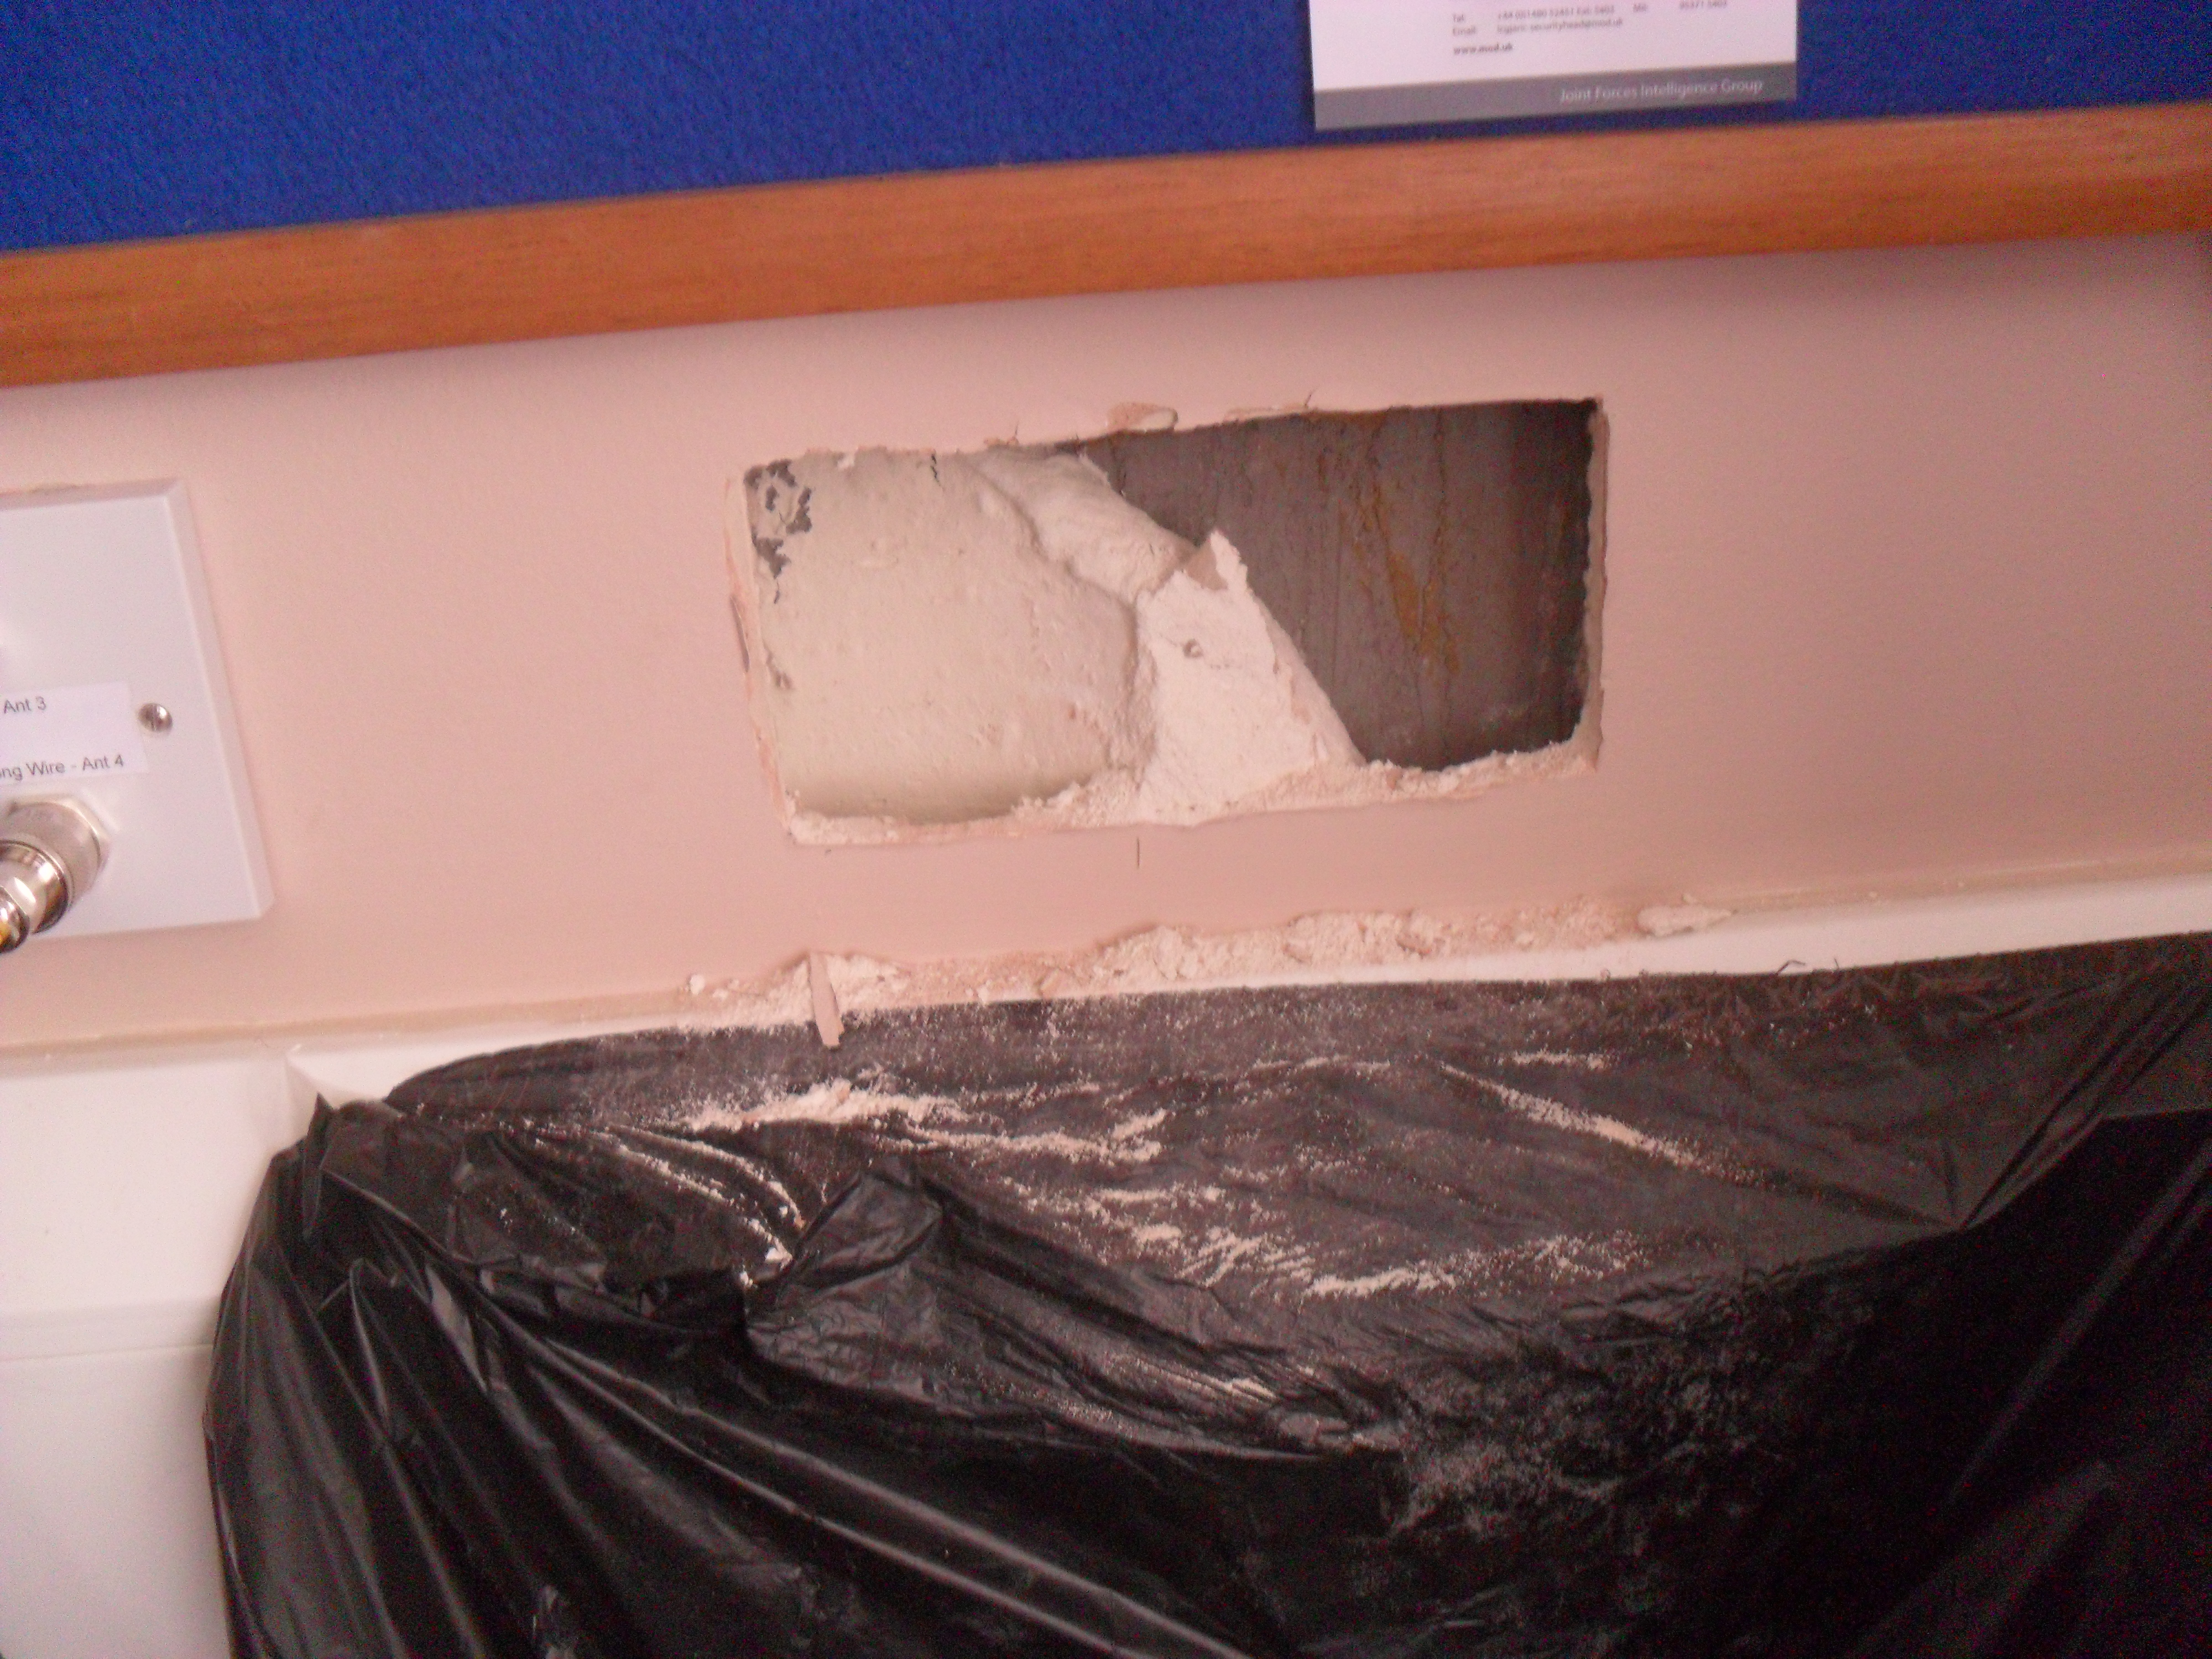
Using a sharp utility knife I scored the plaster board along the pencil markings, repeating this a number of times until the blade cuts through (the finishing lining plasterboard is quite thin for my internal walls, so it was quite easy), you can use the alternate method of drilling a hole at each corner and cut the hole with a plasterboard saw or similar.
I knew by tapping on the plasterboard that the fixing adhesive was right in the middle of the hole, to break the cut board out, I split the board worth a chisel and took each piece out, I try not to let the pieces fall into the cavity between the wall and the board, the adhesive was removed using a bolster chisel, notches in the breeze block were needed to allow the fixing wings of the dry lining box to be fully pushed back to clear the plasterboard:
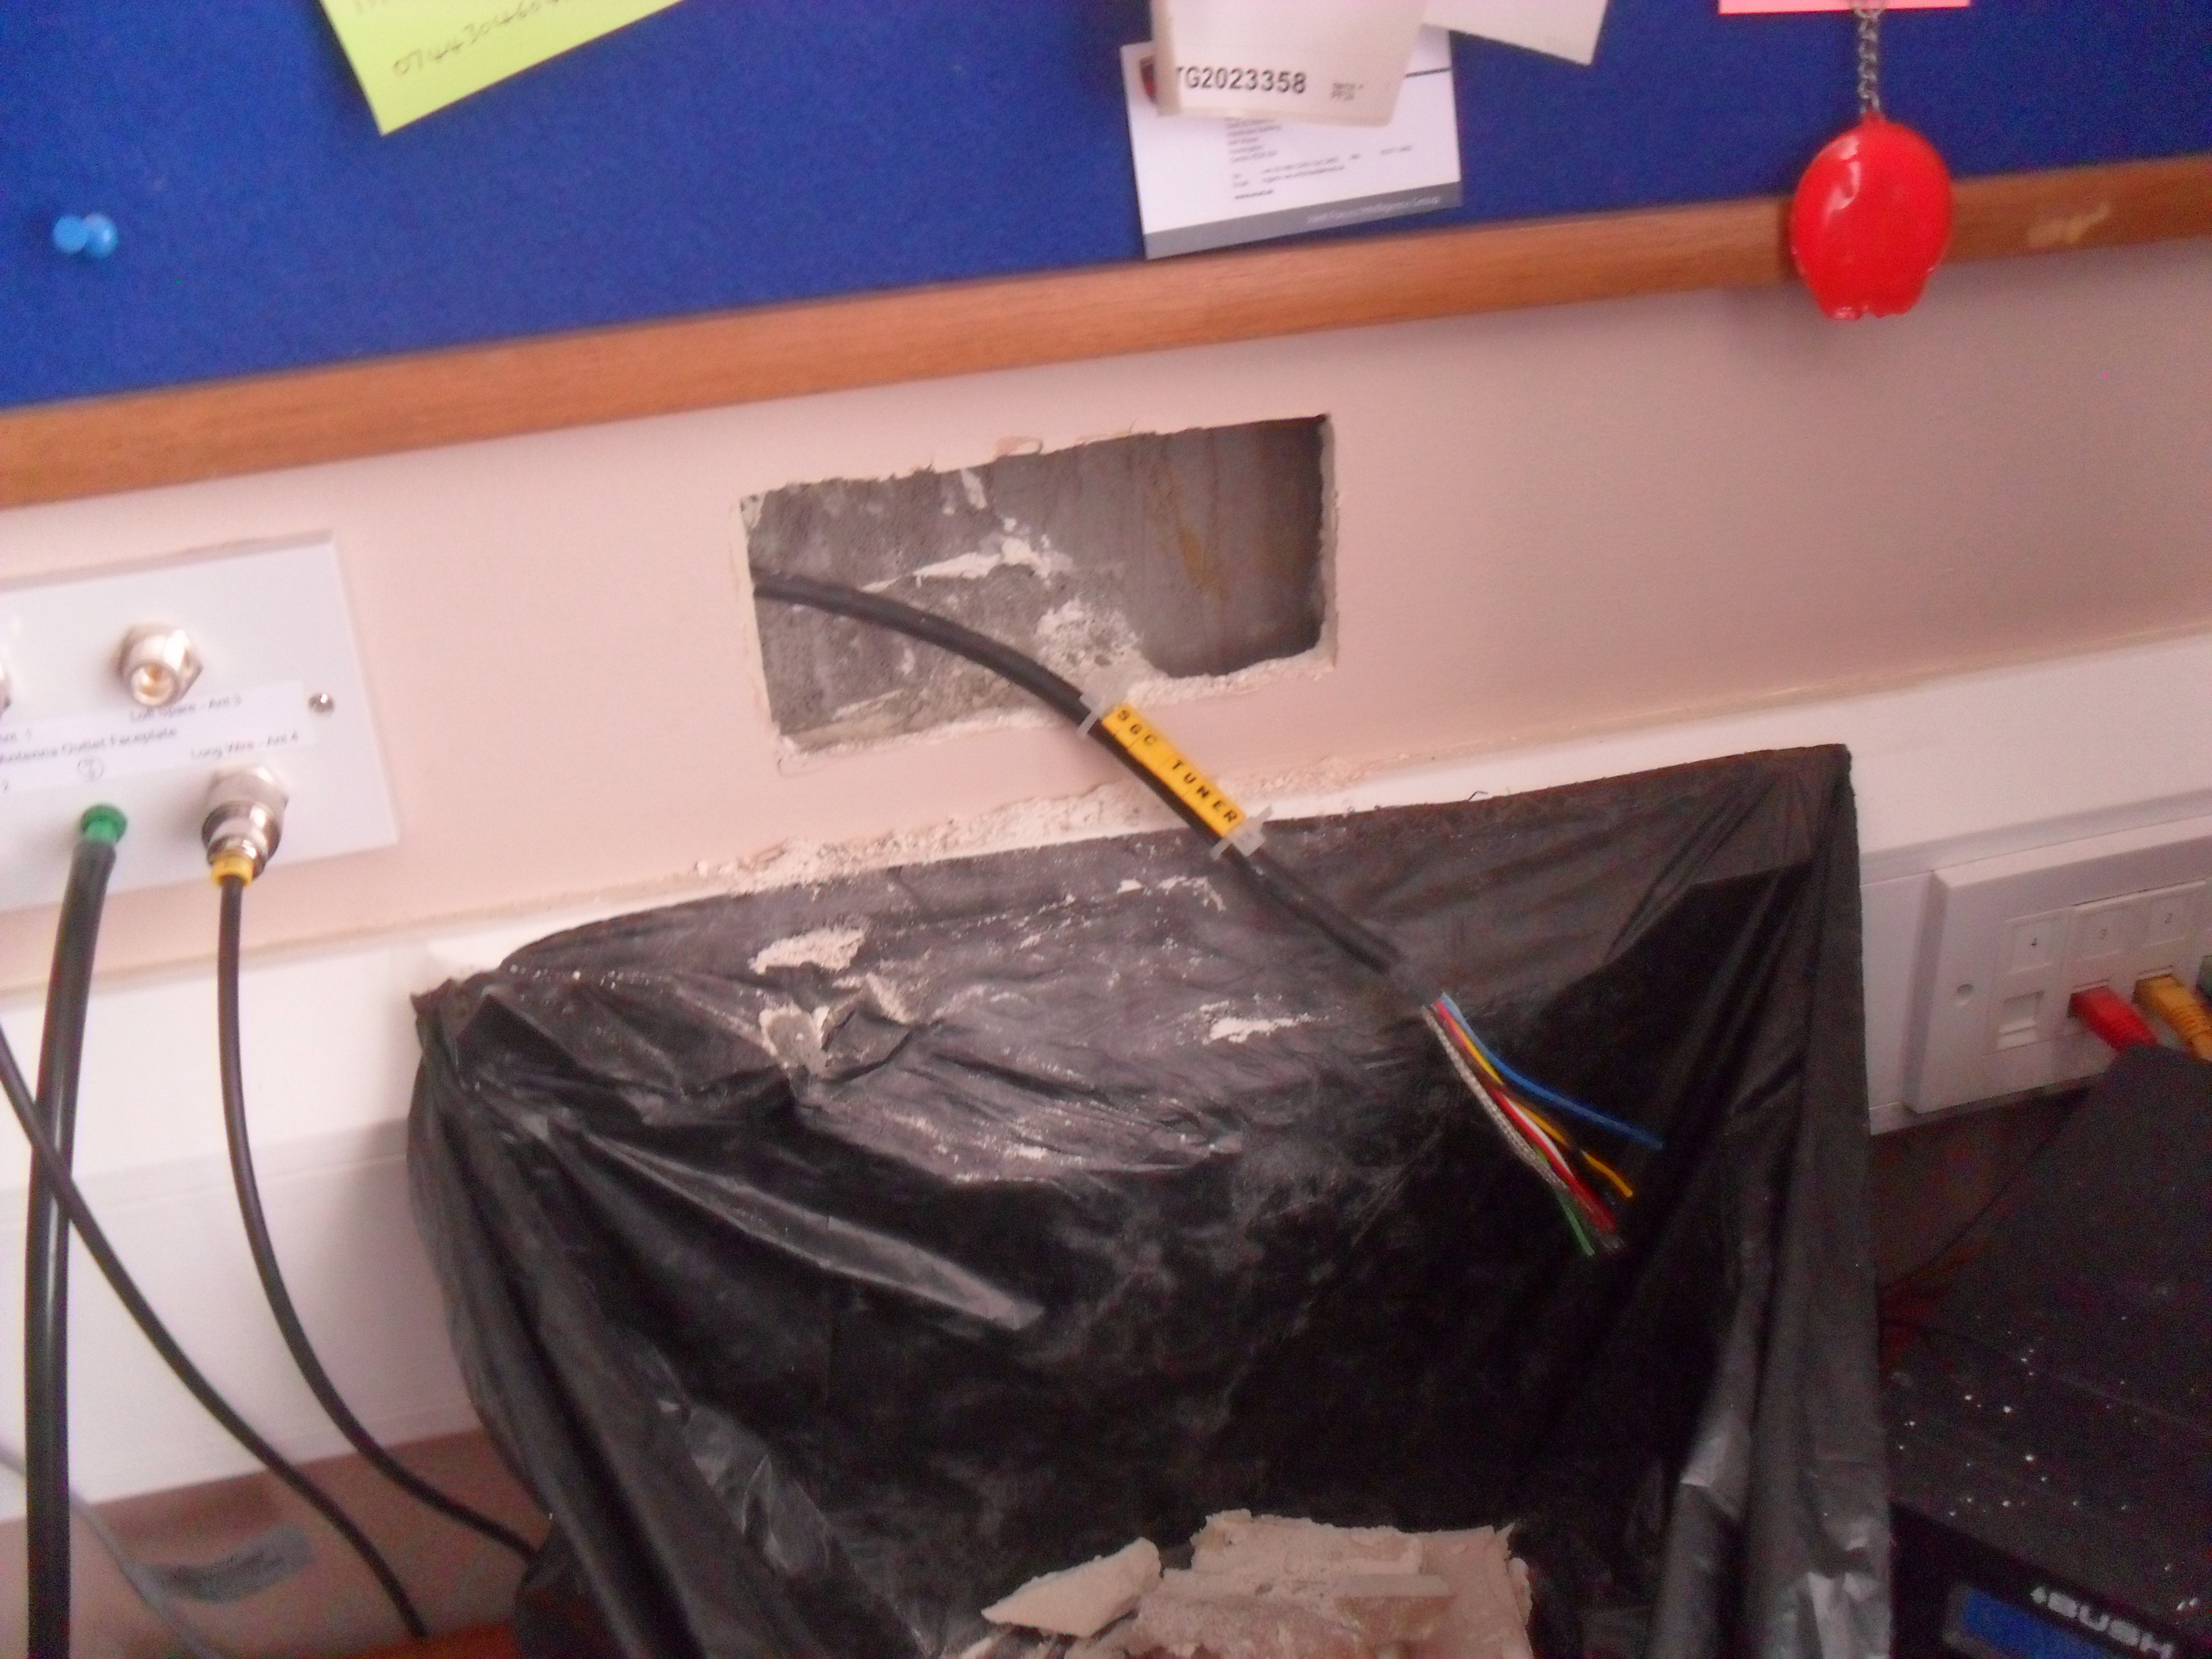
The control cable to the SG-237 tuner was put in place when I was drawing the antenna cables:
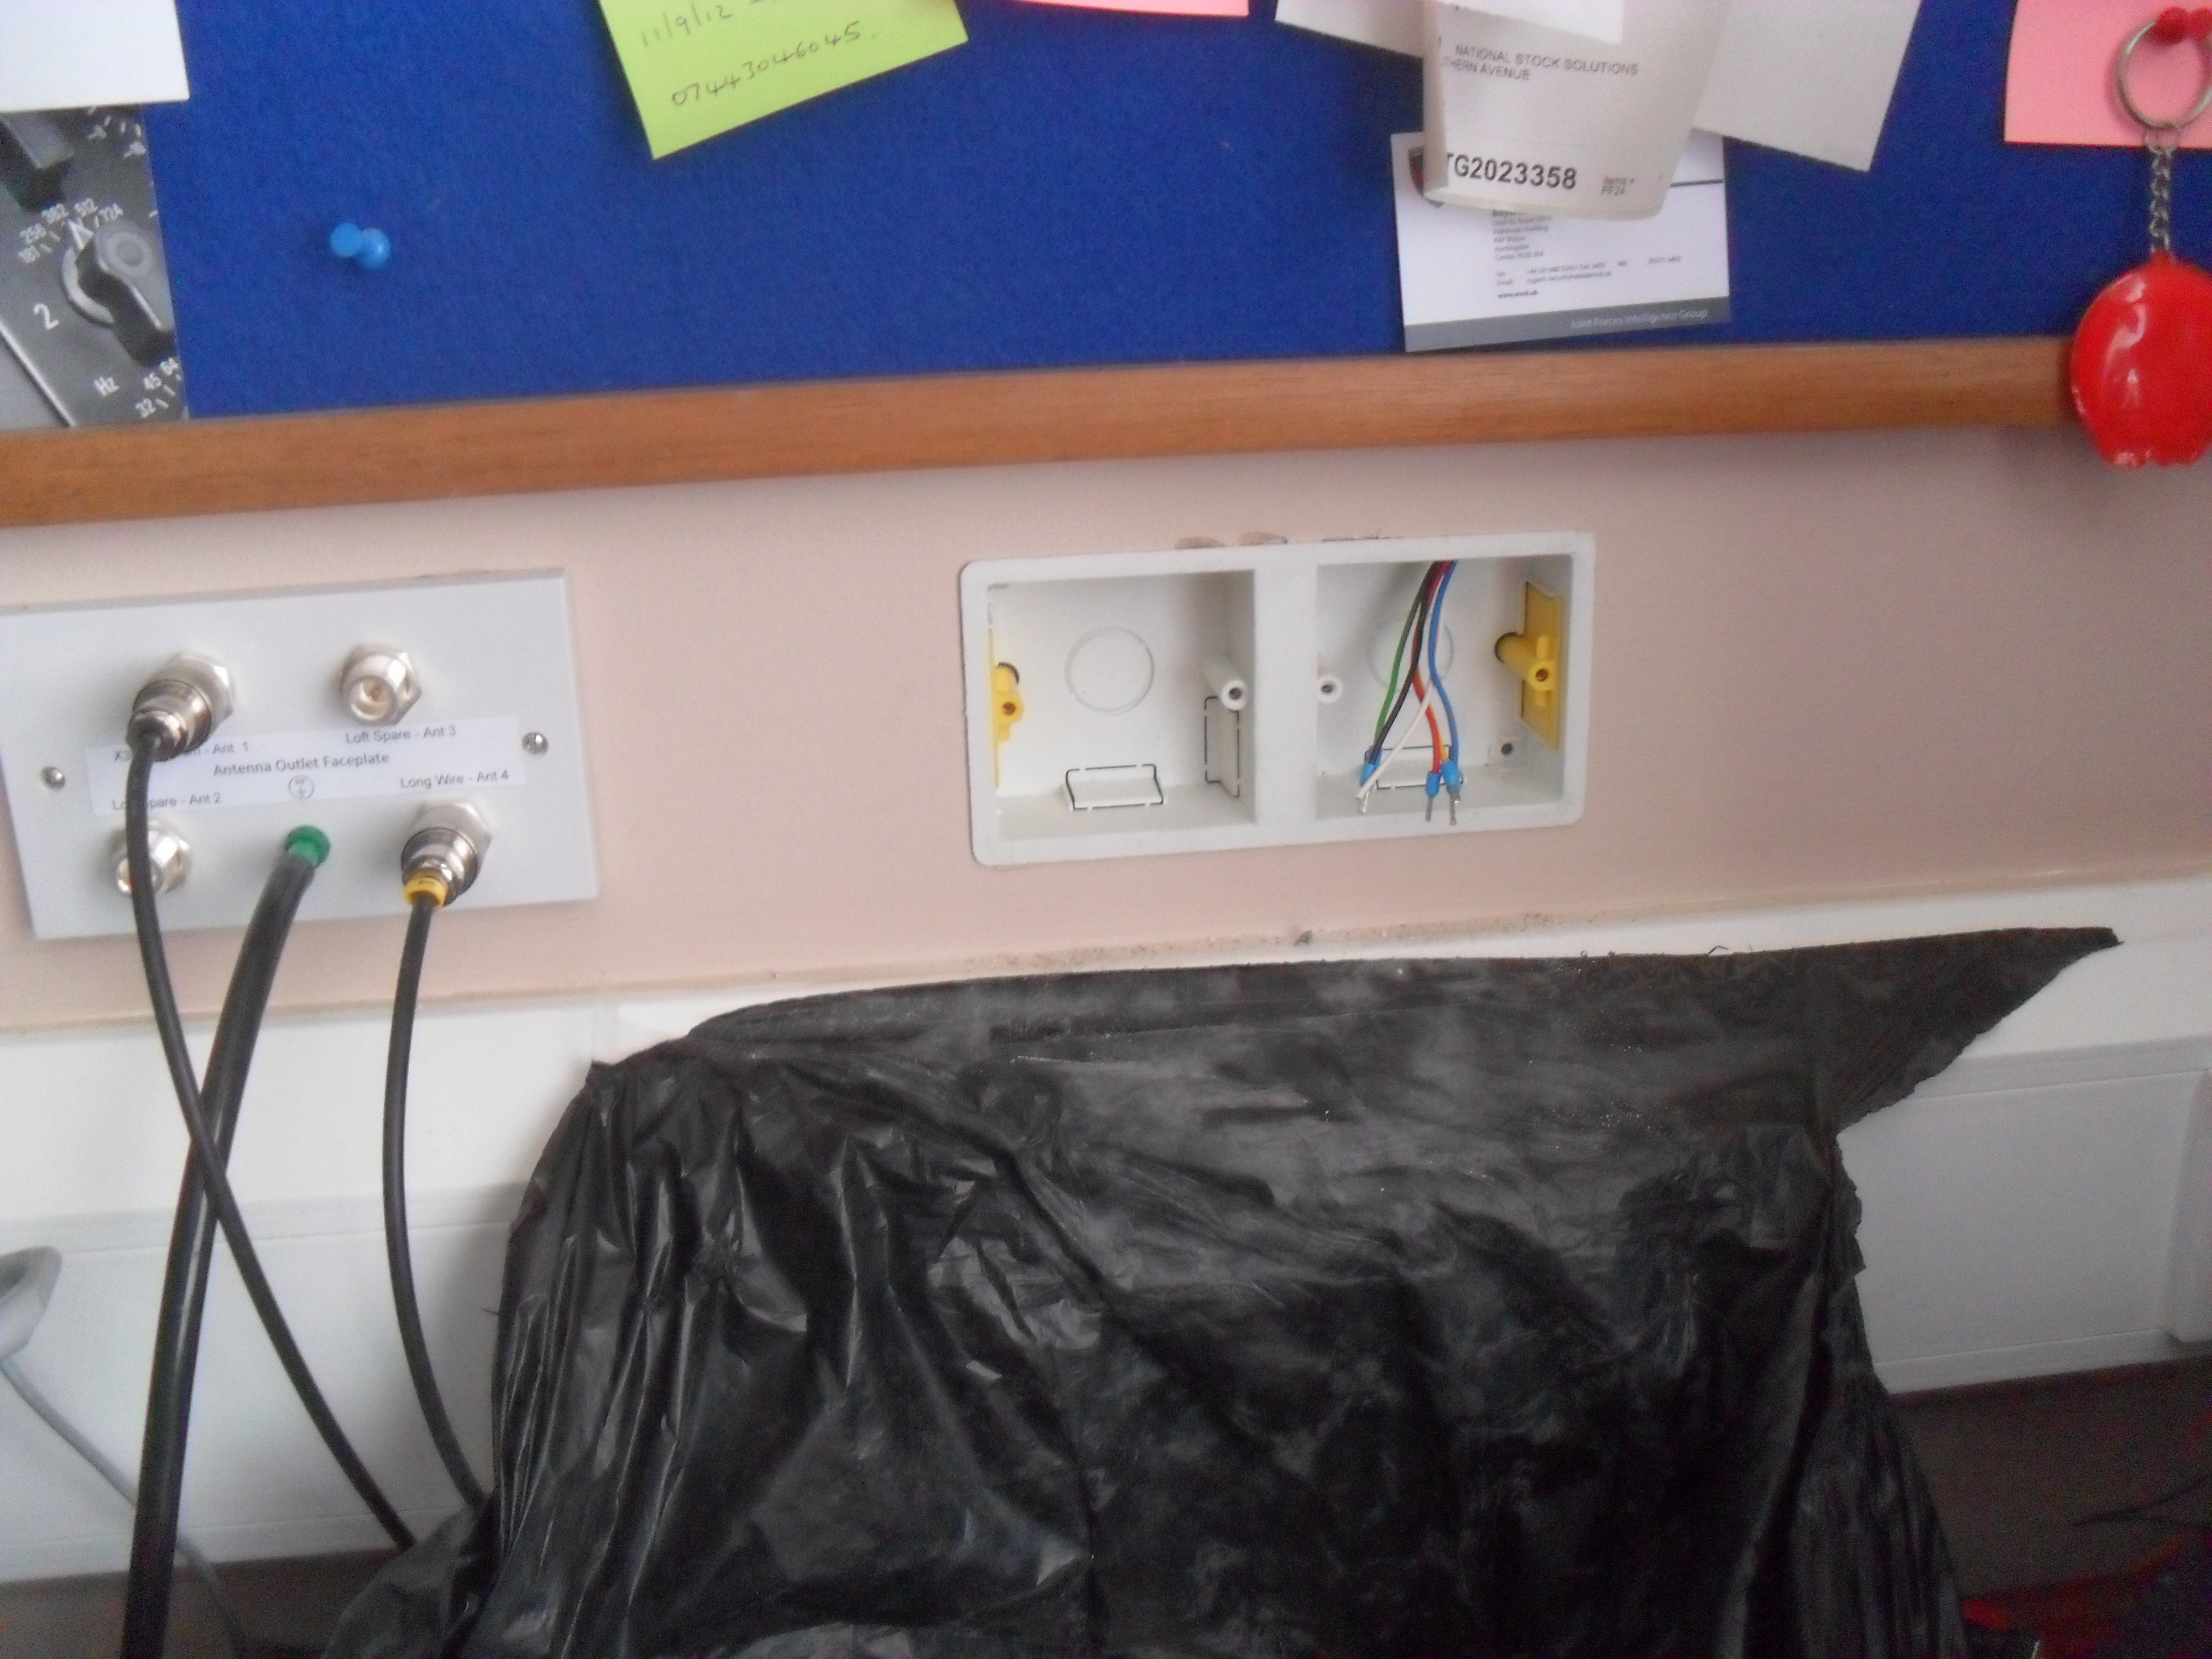
Drylining box in place with cable conductors pin crimped:
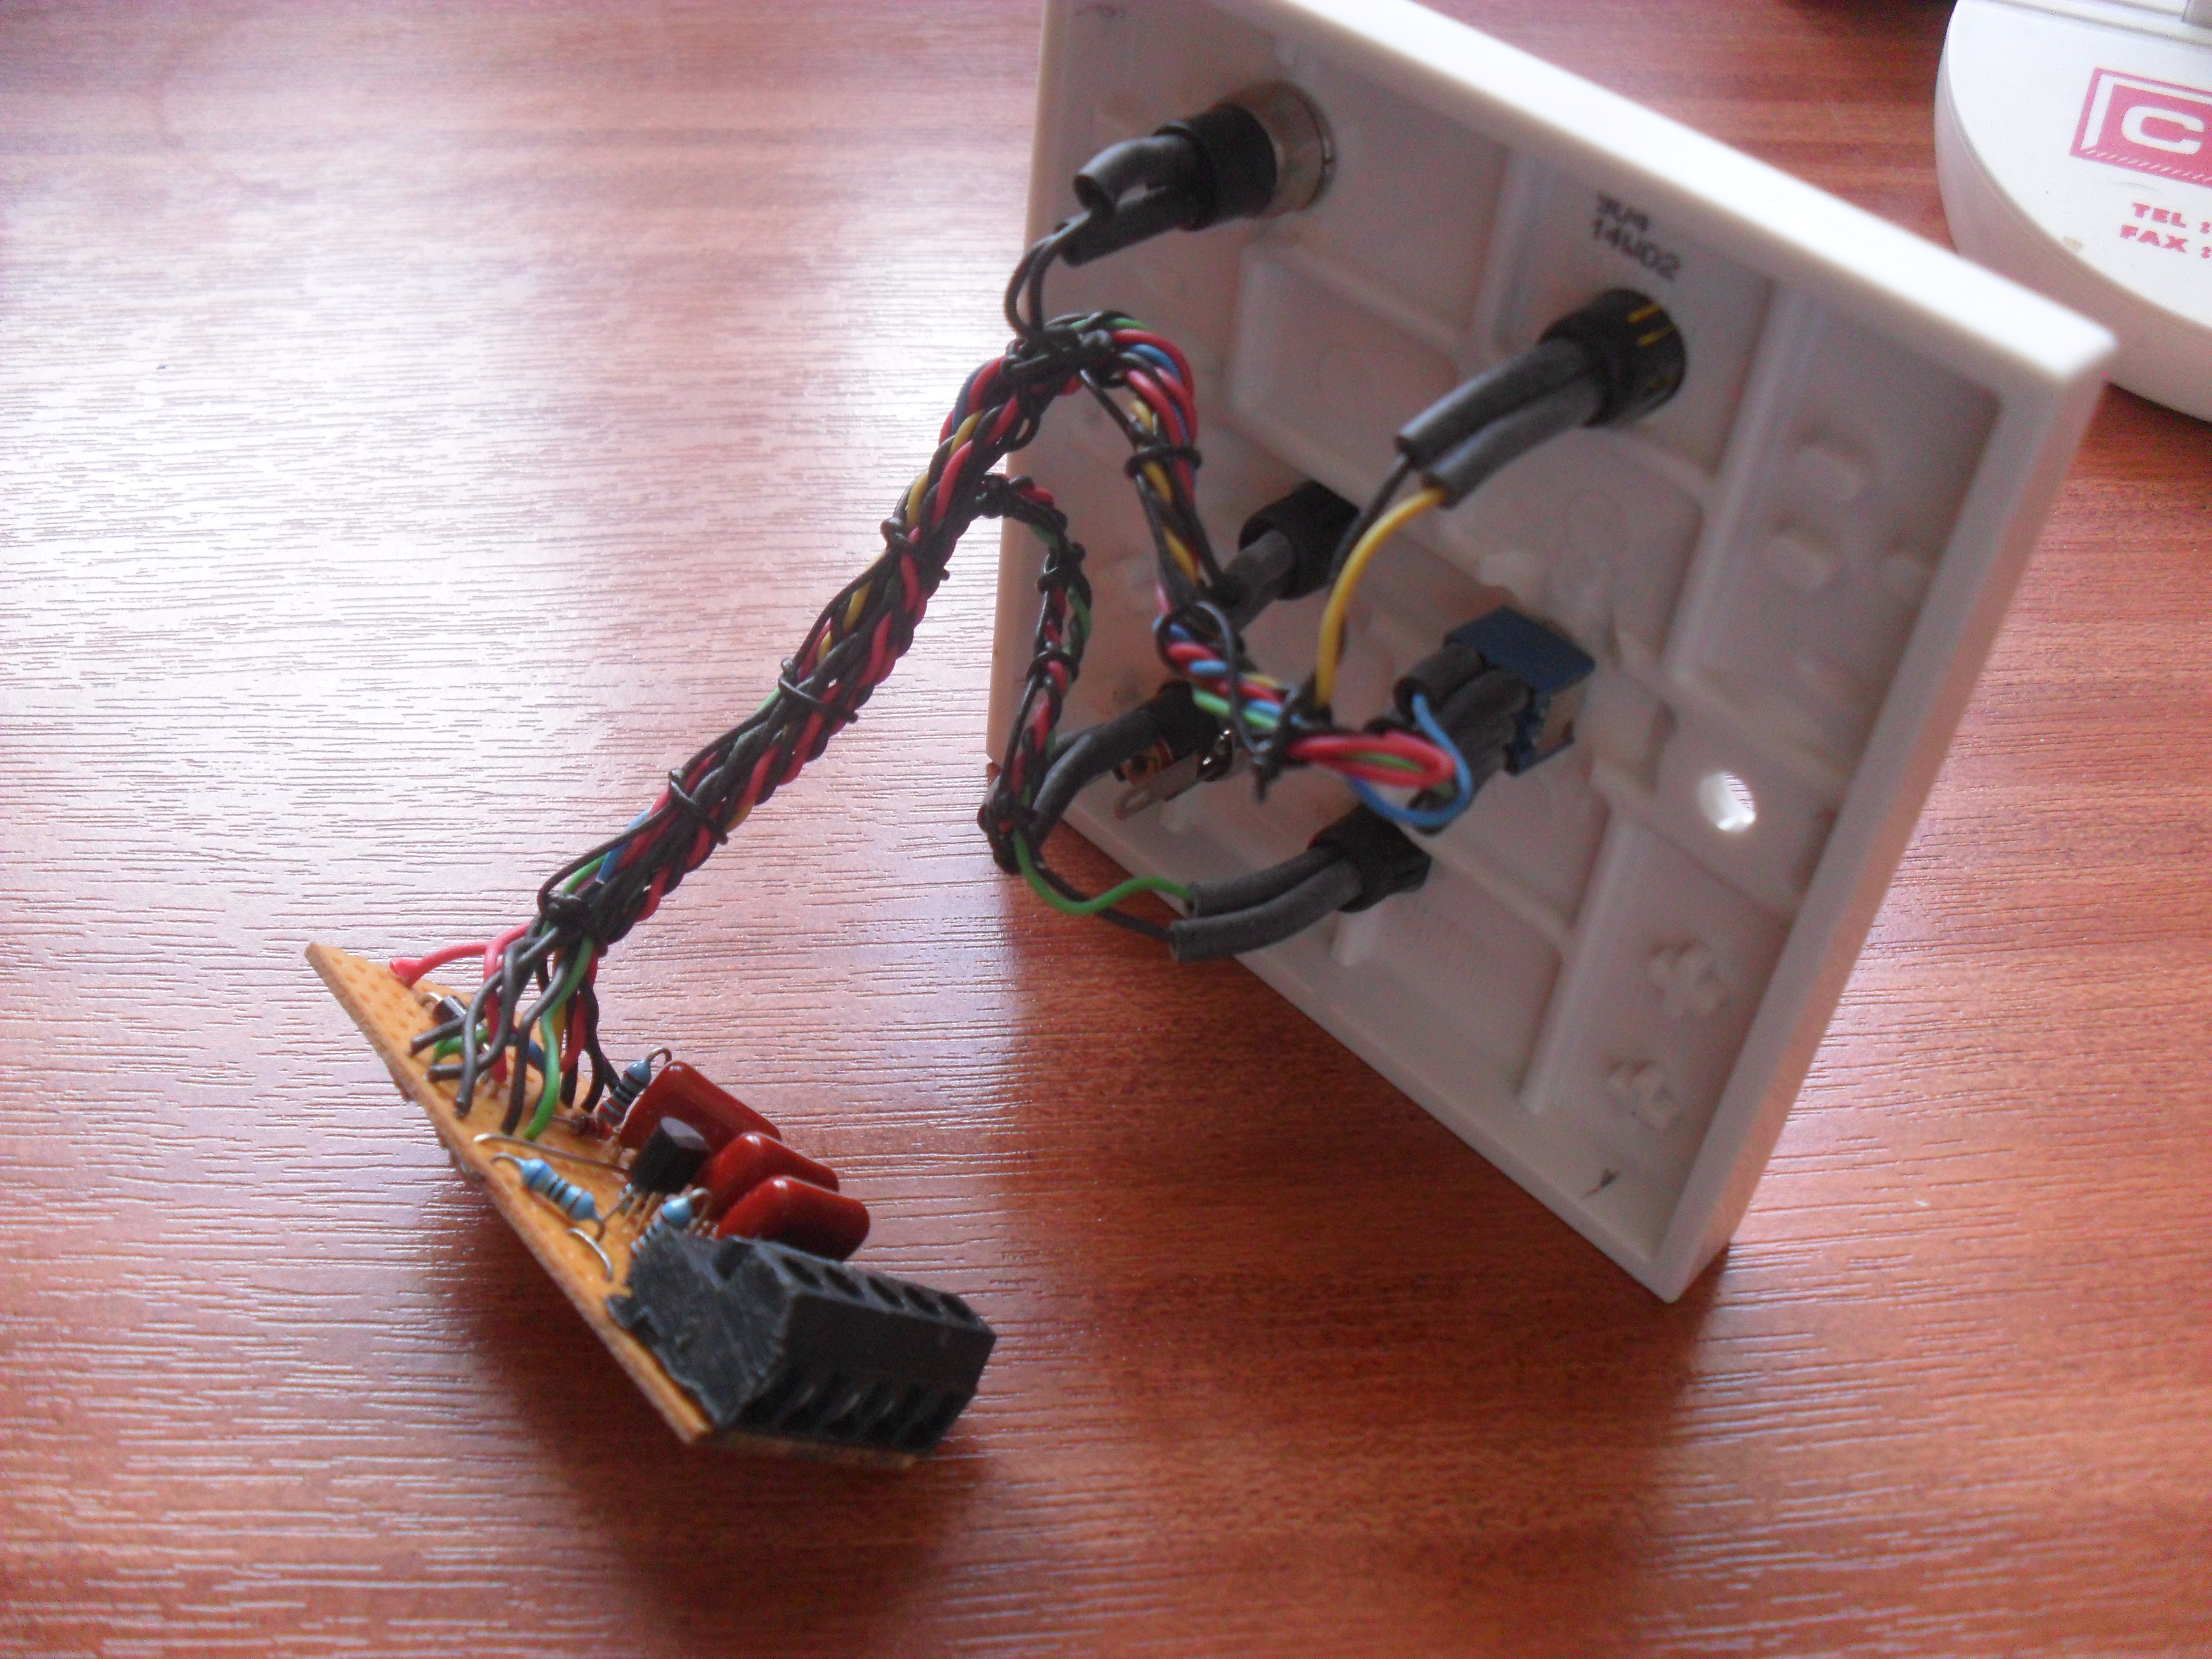
Cable connected to veroboard:
Veroboard sized to fit within rear of backbox:
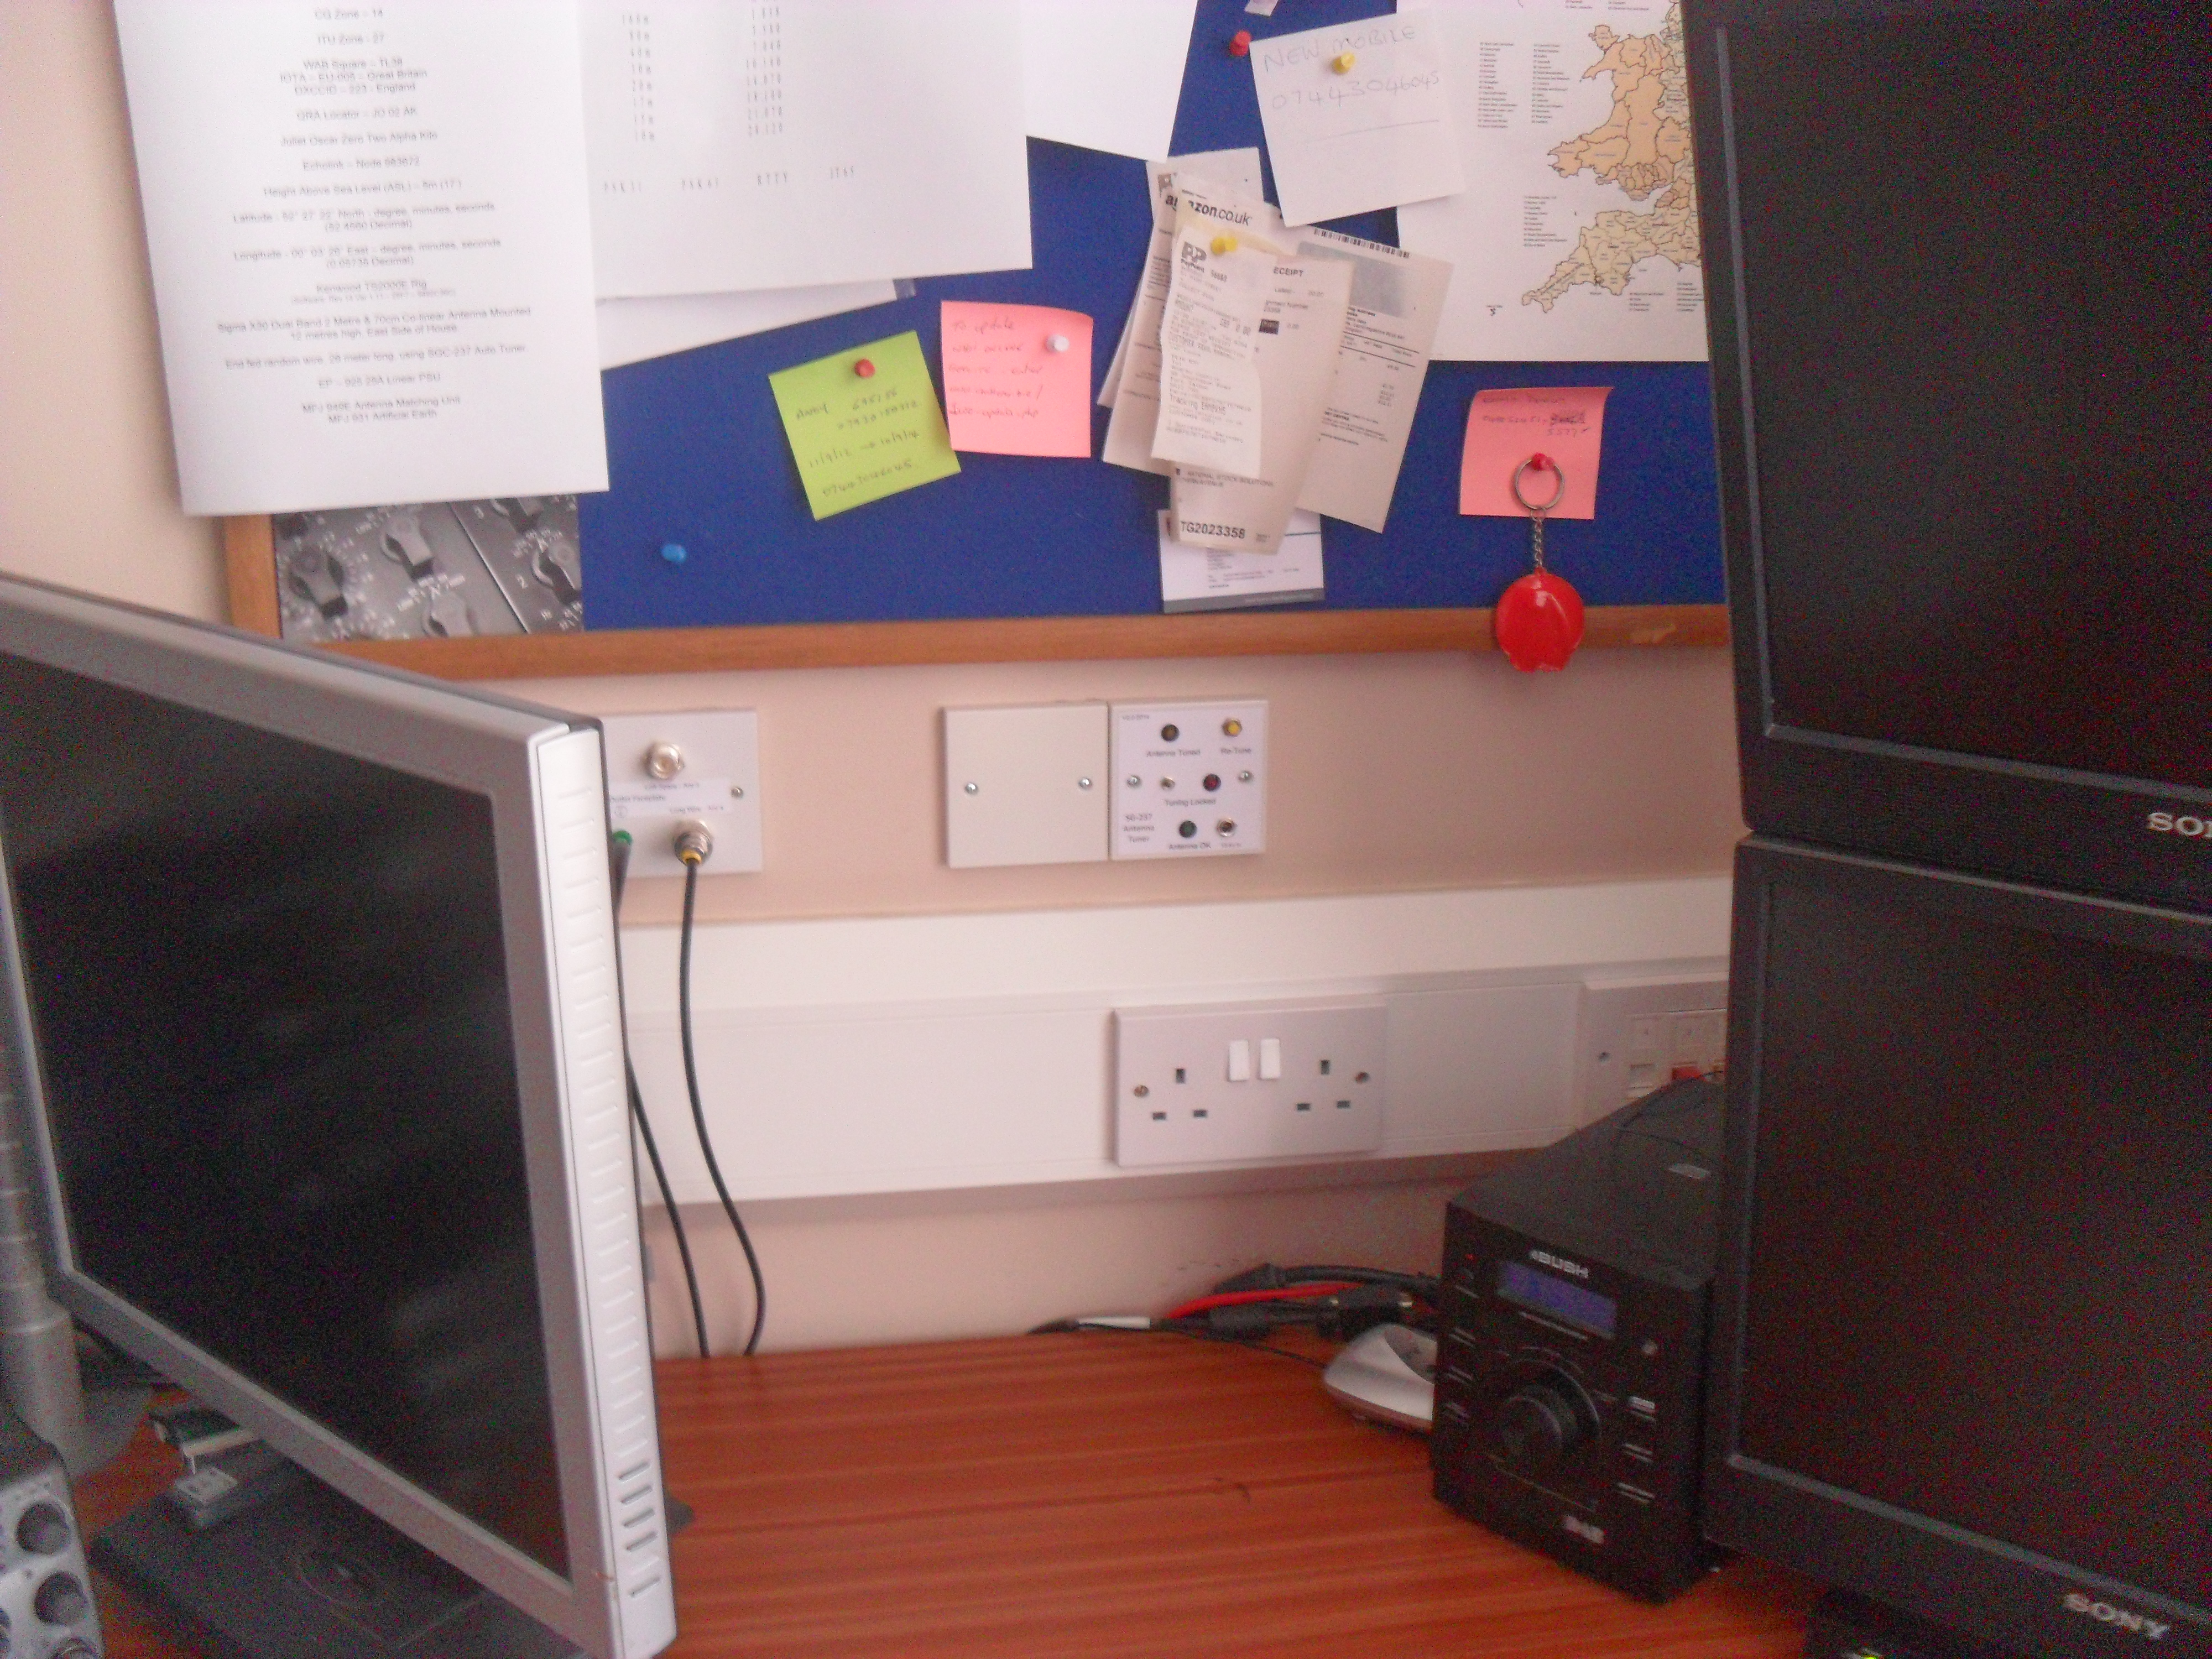
Faceplates screwed on and area cleaned up:
Job done, 12v wall wart PSU plugged in all ready for Part2 hardware and long wire installation.
Received my Radio Ham pass confirmation today, logging into the OFCOM website, I have the new callsign of 2E0DDI, I don’t think I’ll change all my details on QRZ.Com and other forums just yet from M6EID as I’m considering taking the advanced license test in the next few months.
Added Lightning Analysis tab, this opens another page to show statistics from the Boltek lightning detector.
Expanded to Pollen page to show information from The Weather Channel, I have retained the Chatteris map as this has greater detail on it when you follow the link by clicking the map directly.
Glossary of terms added.
Link from the lightning StormVue NGX and Alerts Page has been set up via the TSentry icon, this link takes you to the Contact Me page – TSentry is the software which send the e-mails when certain conditions are met, have a look at the Alerts Page to see what they are.
A blog about stuff that interests me or I have done.
We use cookies on our website to give you the most relevant experience by remembering your preferences and repeat visits. By clicking “Accept All”, you consent to the use of ALL the cookies. However, you may visit "Cookie Settings" to provide a controlled consent.
This website uses cookies to improve your experience while you navigate through the website. Out of these, the cookies that are categorized as necessary are stored on your browser as they are essential for the working of basic functionalities of the website. We also use third-party cookies that help us analyze and understand how you use this website. These cookies will be stored in your browser only with your consent. You also have the option to opt-out of these cookies. But opting out of some of these cookies may affect your browsing experience.
Necessary cookies are absolutely essential for the website to function properly. These cookies ensure basic functionalities and security features of the website, anonymously.
Cookie
Duration
Description
_GRECAPTCHA
5 months 27 days
This cookie is set by the Google recaptcha service to identify bots to protect the website against malicious spam attacks.
cookielawinfo-checkbox-advertisement
1 year
Set by the GDPR Cookie Consent plugin, this cookie is used to record the user consent for the cookies in the "Advertisement" category .
cookielawinfo-checkbox-analytics
11 months
This cookie is set by GDPR Cookie Consent plugin. The cookie is used to store the user consent for the cookies in the category "Analytics".
cookielawinfo-checkbox-functional
11 months
The cookie is set by GDPR cookie consent to record the user consent for the cookies in the category "Functional".
cookielawinfo-checkbox-necessary
11 months
This cookie is set by GDPR Cookie Consent plugin. The cookies is used to store the user consent for the cookies in the category "Necessary".
cookielawinfo-checkbox-others
11 months
This cookie is set by GDPR Cookie Consent plugin. The cookie is used to store the user consent for the cookies in the category "Other.
cookielawinfo-checkbox-performance
11 months
This cookie is set by GDPR Cookie Consent plugin. The cookie is used to store the user consent for the cookies in the category "Performance".
CookieLawInfoConsent
1 year
Records the default button state of the corresponding category & the status of CCPA. It works only in coordination with the primary cookie.
PHPSESSID
session
This cookie is native to PHP applications. The cookie is used to store and identify a users' unique session ID for the purpose of managing user session on the website. The cookie is a session cookies and is deleted when all the browser windows are closed.
viewed_cookie_policy
11 months
The cookie is set by the GDPR Cookie Consent plugin and is used to store whether or not user has consented to the use of cookies. It does not store any personal data.
Functional cookies help to perform certain functionalities like sharing the content of the website on social media platforms, collect feedbacks, and other third-party features.
Performance cookies are used to understand and analyze the key performance indexes of the website which helps in delivering a better user experience for the visitors.
Analytical cookies are used to understand how visitors interact with the website. These cookies help provide information on metrics the number of visitors, bounce rate, traffic source, etc.
Cookie
Duration
Description
_ga
2 years
The _ga cookie, installed by Google Analytics, calculates visitor, session and campaign data and also keeps track of site usage for the site's analytics report. The cookie stores information anonymously and assigns a randomly generated number to recognize unique visitors.
_ga_92TJCVGJP2
2 years
This cookie is installed by Google Analytics.
_gat_gtag_UA_48800884_1
1 minute
Set by Google to distinguish users.
_gid
1 day
Installed by Google Analytics, _gid cookie stores information on how visitors use a website, while also creating an analytics report of the website's performance. Some of the data that are collected include the number of visitors, their source, and the pages they visit anonymously.
CONSENT
2 years
YouTube sets this cookie via embedded youtube-videos and registers anonymous statistical data.
is_unique
5 years
StatCounter sets this cookie to determine whether a user is a first-time or a returning visitor and to estimate the accumulated unique visits per site.
is_visitor_unique
2 years
StatCounter sets this cookie to determine whether a user is a first-time or a returning visitor.
sc_is_visitor_unique
2 years
StatCounter sets this cookie to determine whether a user is a first-time or a returning visitor.
Advertisement cookies are used to provide visitors with relevant ads and marketing campaigns. These cookies track visitors across websites and collect information to provide customized ads.
Cookie
Duration
Description
NID
6 months
NID cookie, set by Google, is used for advertising purposes; to limit the number of times the user sees an ad, to mute unwanted ads, and to measure the effectiveness of ads.
VISITOR_INFO1_LIVE
past
A cookie set by YouTube to measure bandwidth that determines whether the user gets the new or old player interface.
YSC
session
YSC cookie is set by Youtube and is used to track the views of embedded videos on Youtube pages.
yt-remote-connected-devices
never
YouTube sets this cookie to store the video preferences of the user using embedded YouTube video.
yt-remote-device-id
never
YouTube sets this cookie to store the video preferences of the user using embedded YouTube video.
yt.innertube::nextId
never
This cookie, set by YouTube, registers a unique ID to store data on what videos from YouTube the user has seen.
yt.innertube::requests
never
This cookie, set by YouTube, registers a unique ID to store data on what videos from YouTube the user has seen.