My existing Sonoff watering control comprises of a Sonoff Basic to turn the irrigation pump ON/OFF and a Sonoff 4 Channel Pro which controls which set of lawn valves to Open/Close.
My existing setup had an automatic scene to water the lawn when the grass had established, however, I wanted a Scene to automatically run for a newly seeded lawn which just kept the seed moist by frequent watering, but short in duration so as not to wash the seed away.
My existing system has a Rain Sensor, so if it has already rained, the scene would still run, but the power supply to the irrigation pump is removed until the rains sensor is happy.
List of Requirements:
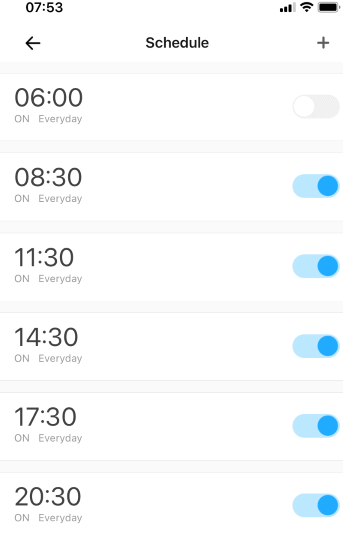
- Water the lawn every 3 hours
- Start watering at 06:00
- Stop watering at 20:30
- Sprinkler duration 5 minutes
How:
I had to use another Sonoff Basic as a Smart Device trigger to start the irrigation scene.
- Triggering Basic device setup to have ‘Inching’ enabled with a short duration ‘ON’ time
- Set up a schedule to turn the Basic on at the required times, (no OFF time is required as the Basic is in inching mode)
- Turn the Basic schedule ON and save

- Create a new Scene
- Set the IF action trigger to be the Smart Device Basic
- Set the THEN actions
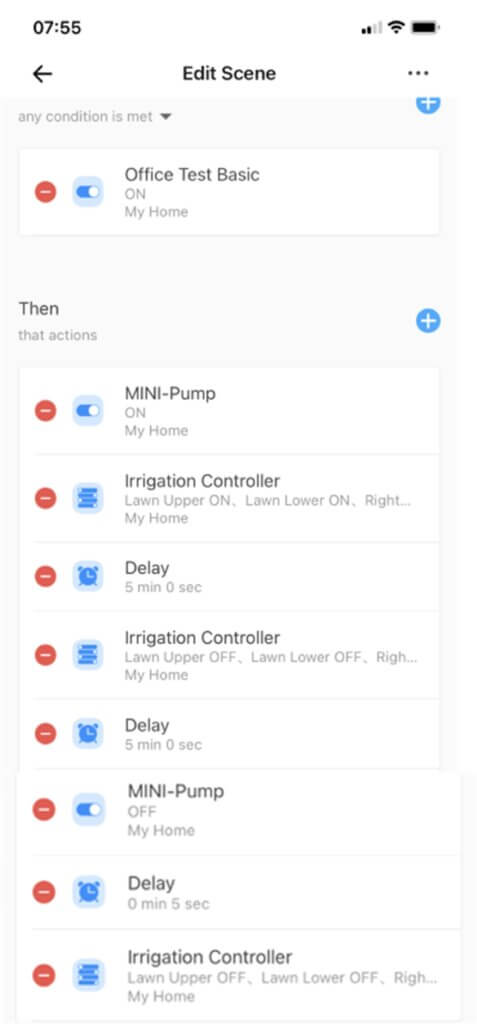
In my scene, the following happens:
- Scene triggered by the Basic switching at the scheduled time
- Then, irrigation pump turns on
- And, the Irrigation Controller (4 channel Pro) switches power to Open sprinkler valves on two sections of my lawn
- after a 5 minute delay the Irrigation Controller closes the two valves and opens another lawn areas valve
- after a further 5 minute delay, the irrigation pump turns off
- 5 seconds after the pump turns off, the irrigation controller closes all the valves (delayed to allow the water pressure to fall)
I had help with this from the eWeLink & Sonoff User Group on Facebook and in particular Stipan Retkovac who has extensive knowledge in this area and to whom I particularly grateful.

